Restorative Masonry Cleaning Methods: SWR Institute Fall Technical Meeting 2025
Executive Summary
Restorative cleaning plays a critical role in the long-term preservation, performance, and appearance of masonry building enclosures. Yet it remains one of the most misunderstood scopes of façade restoration. Owners often view cleaning as a cosmetic step, contractors may underestimate the sensitivity of historic substrates, and project teams frequently overlook the operational, environmental, and sequencing considerations that determine whether cleaning protects or harms a structure.
This whitepaper provides a technical framework for understanding, evaluating, and executing restorative cleaning on masonry façades. Drawing from the 2025 SWR Institute Fall Technical Meeting presentation by RestoreWorks CEO Don Zuidema, it combines industry best practices with field-tested insights gathered over three decades of work on historic, commercial, and institutional buildings throughout Chicago and the Midwest. The result is a unified resource appropriate for architects, structural engineers, GC project managers, and building owners seeking a deeper understanding of masonry cleaning techniques and their practical application.
It integrates three essential components:
- Technical rigor: detailed explanations of water, chemical, and abrasive cleaning methods, including appropriate substrates, soiling profiles, risk variables, environmental constraints, and application requirements.
- Field-driven insight: real project moments that illuminate why certain techniques succeed or fail, and how experienced practitioners evaluate risk and sequence work.
- Decision-making frameworks: guidance to help design professionals, GCs, and owners choose methods responsibly, set realistic expectations, and reduce avoidable failures.
The intention is to provide not just information, but clarity: how restorative cleaning works, why it matters, and what responsible execution looks like on complex building facades.
I. Introduction: How a Single Project Reframed the Purpose of Cleaning
In 1987, early in his career, Don Zuidema was asked to clean the façade of a brick building affected by an adjacent fire. At the time he was not a restoration contractor, just a young professional who had been laid off from his first job, working with a trailer-mounted pressure washer to take on whatever cleaning tasks he could find. The fire-damaged façade was coated in thick smoke and soot. Don contacted a cleaning representative he had met months earlier, selected a product, and completed a small mock-up to test the process.
What happened next would shape his entire approach to façade restoration.
As he rinsed the cleaned patch, the original color and character of the brick reappeared. Not artificially bright, not stripped raw, simply true to its history. Seeing the material respond, witnessing how much of the building’s character was still present beneath the damage, reframed cleaning from a commodity task into a form of architectural recovery.
This experience introduced the guiding principle that anchors this whitepaper:
Restorative cleaning is not the pursuit of perfection. It is the controlled removal of foreign material to reveal, not alter, the building’s authentic state.
Every method, every product, and every decision must flow from that principle.
II. Defining Restorative Cleaning in a Technical Context
The SWR Institute emphasizes restorative cleaning as a controlled, expert-led process intended to return masonry to its historically accurate visual condition while preserving the substrate’s physical integrity. This definition establishes two critical boundaries:
1. Cleaning must not damage the masonry.
Any method that removes parent material, erodes carved detail, or permanently alters surface characteristics is considered a failure, regardless of visual improvement.
2. Cleaning must not manufacture an appearance that never existed.
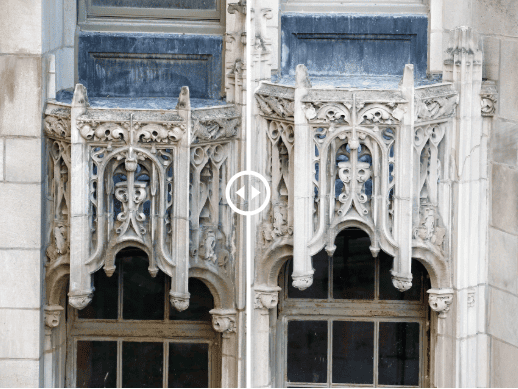
Historic masonry should not be forced to look “new.” A façade that is 80-90% clean, but stable, is preferable to a façade overcleaned to achieve unrealistic uniformity. Within this professional context, restorative cleaning is fundamentally a preservation activity, governed by the same values that guide repointing, patching, consolidation, and stabilization.
III. Core Variables That Dictate Cleaning Method Selection
Before a responsible contractor selects a cleaning method, several conditions must be understood and documented. These variables determine not only which approach will produce acceptable results, but also which methods could cause irreversible damage.
Each variable below represents a non-negotiable decision input.
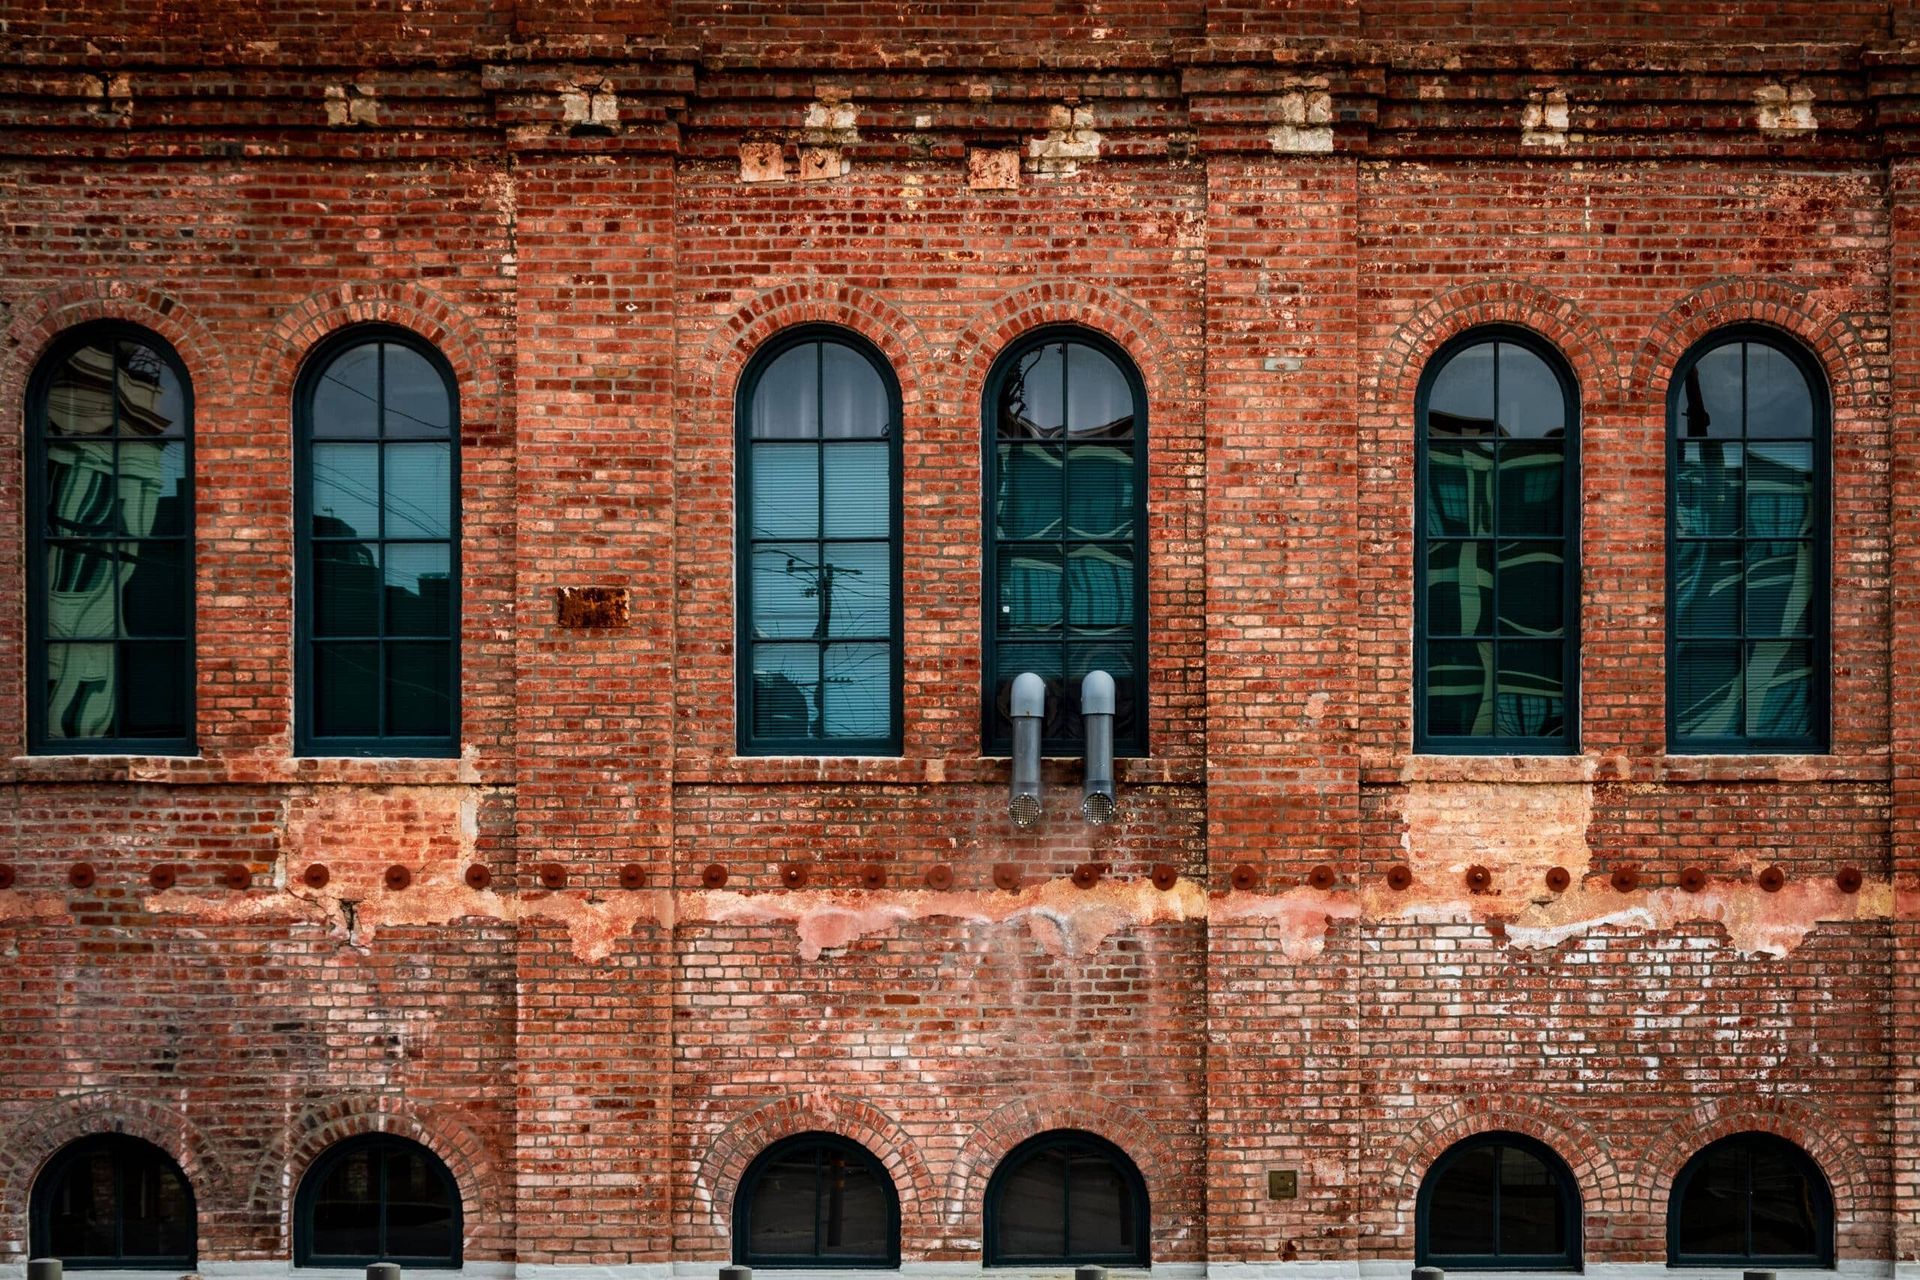
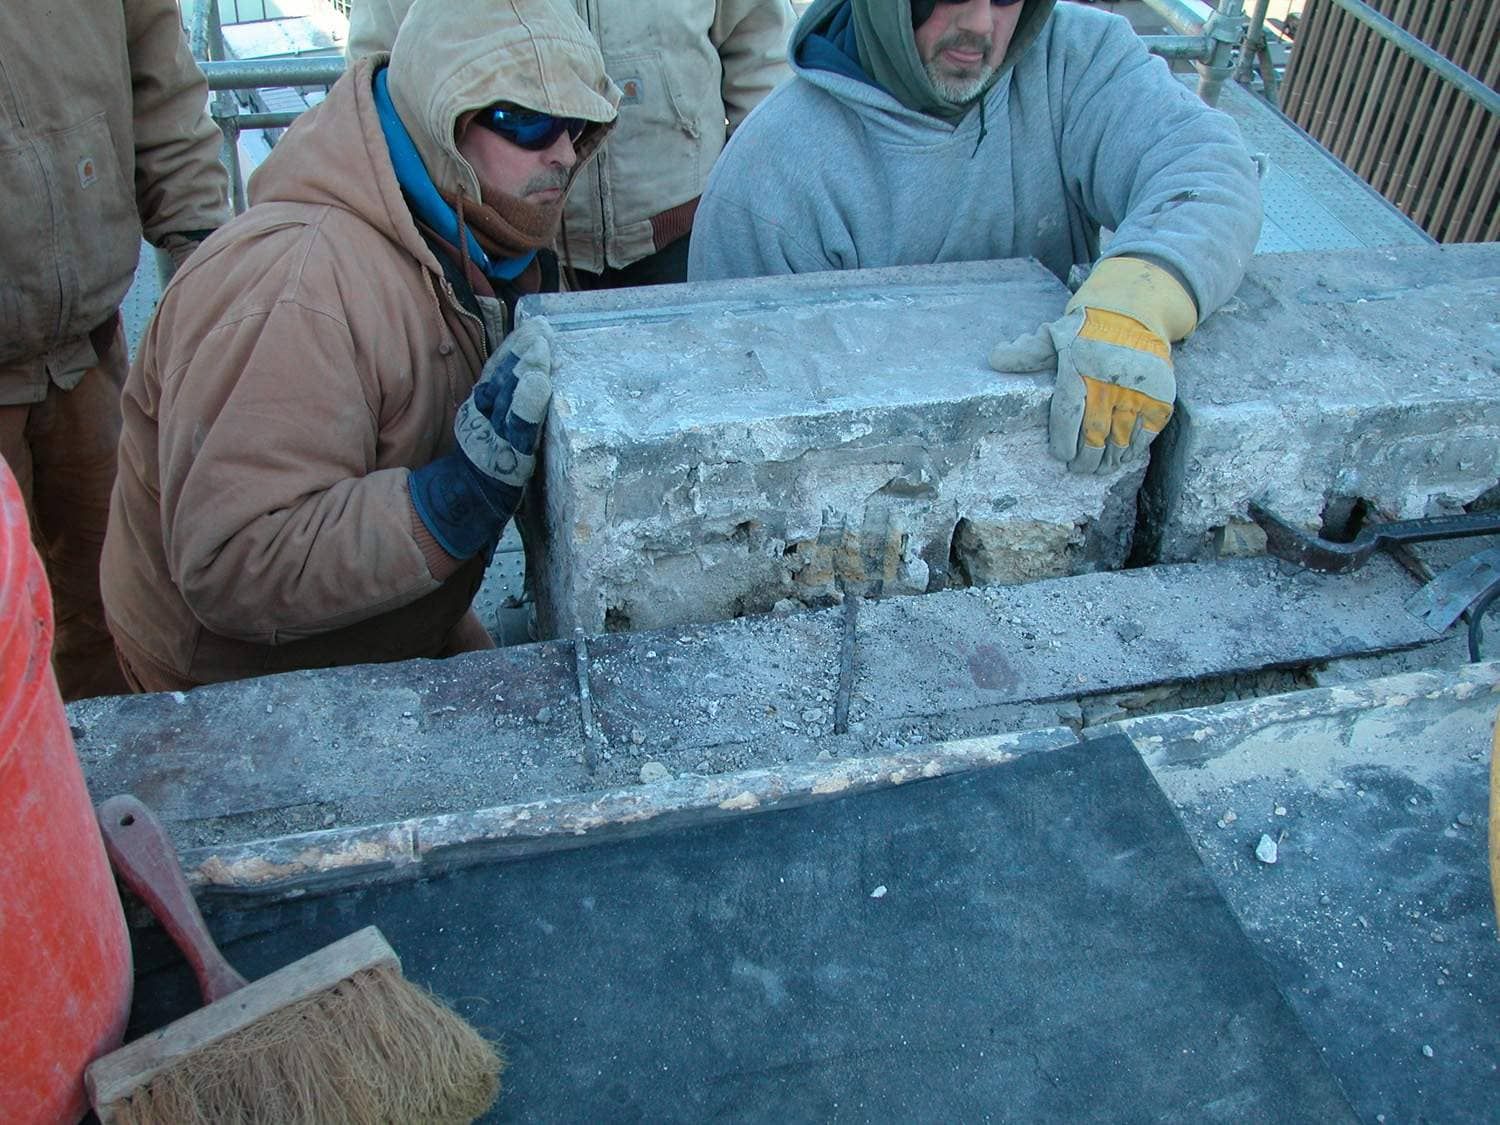
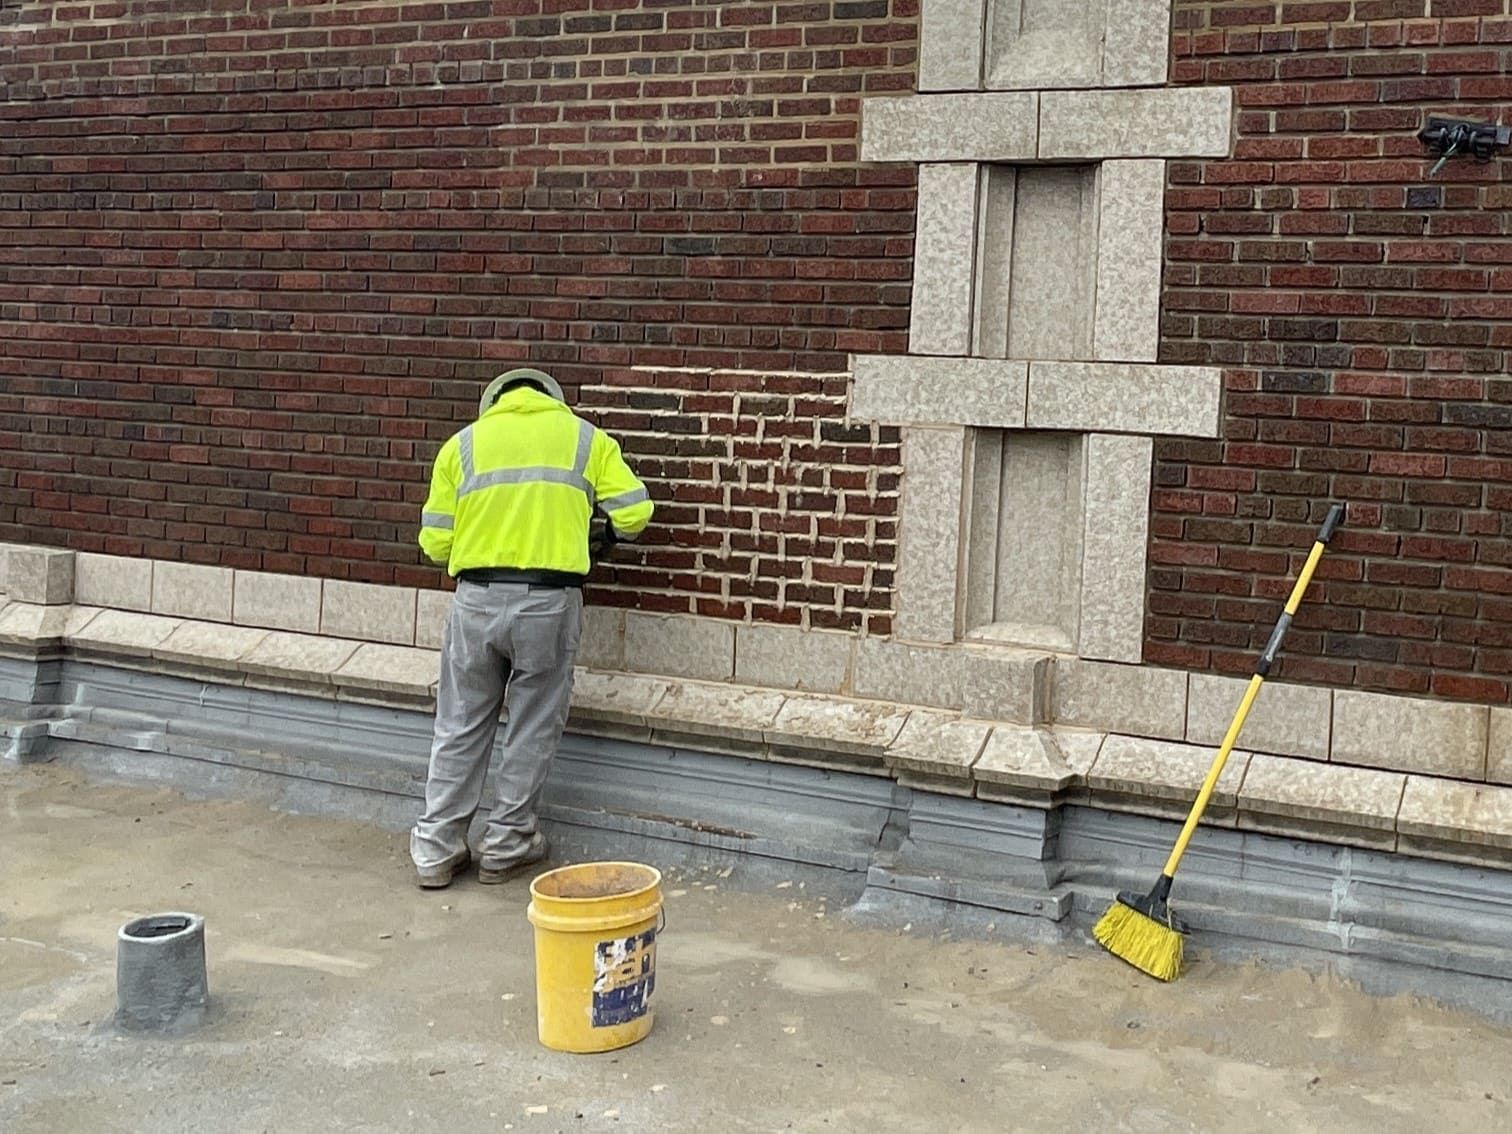
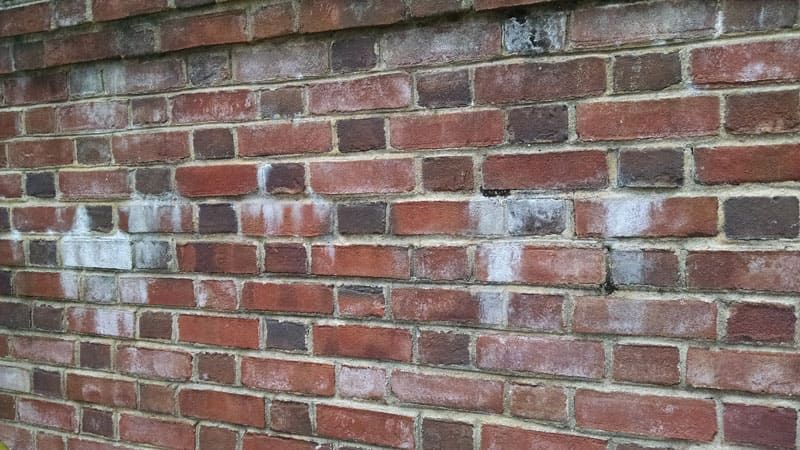
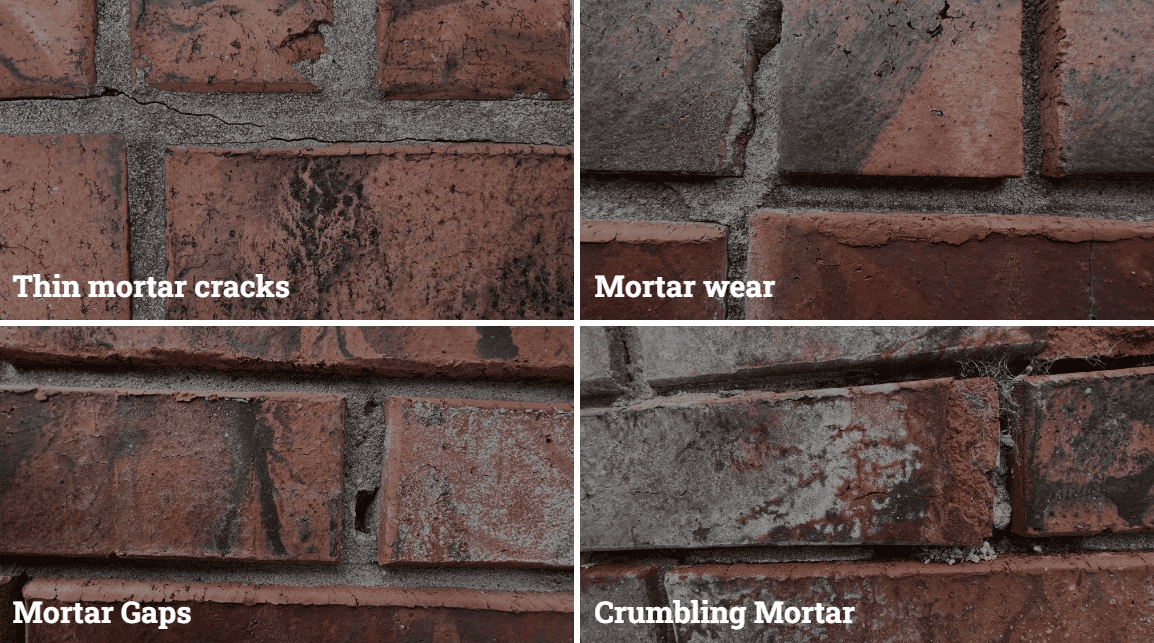
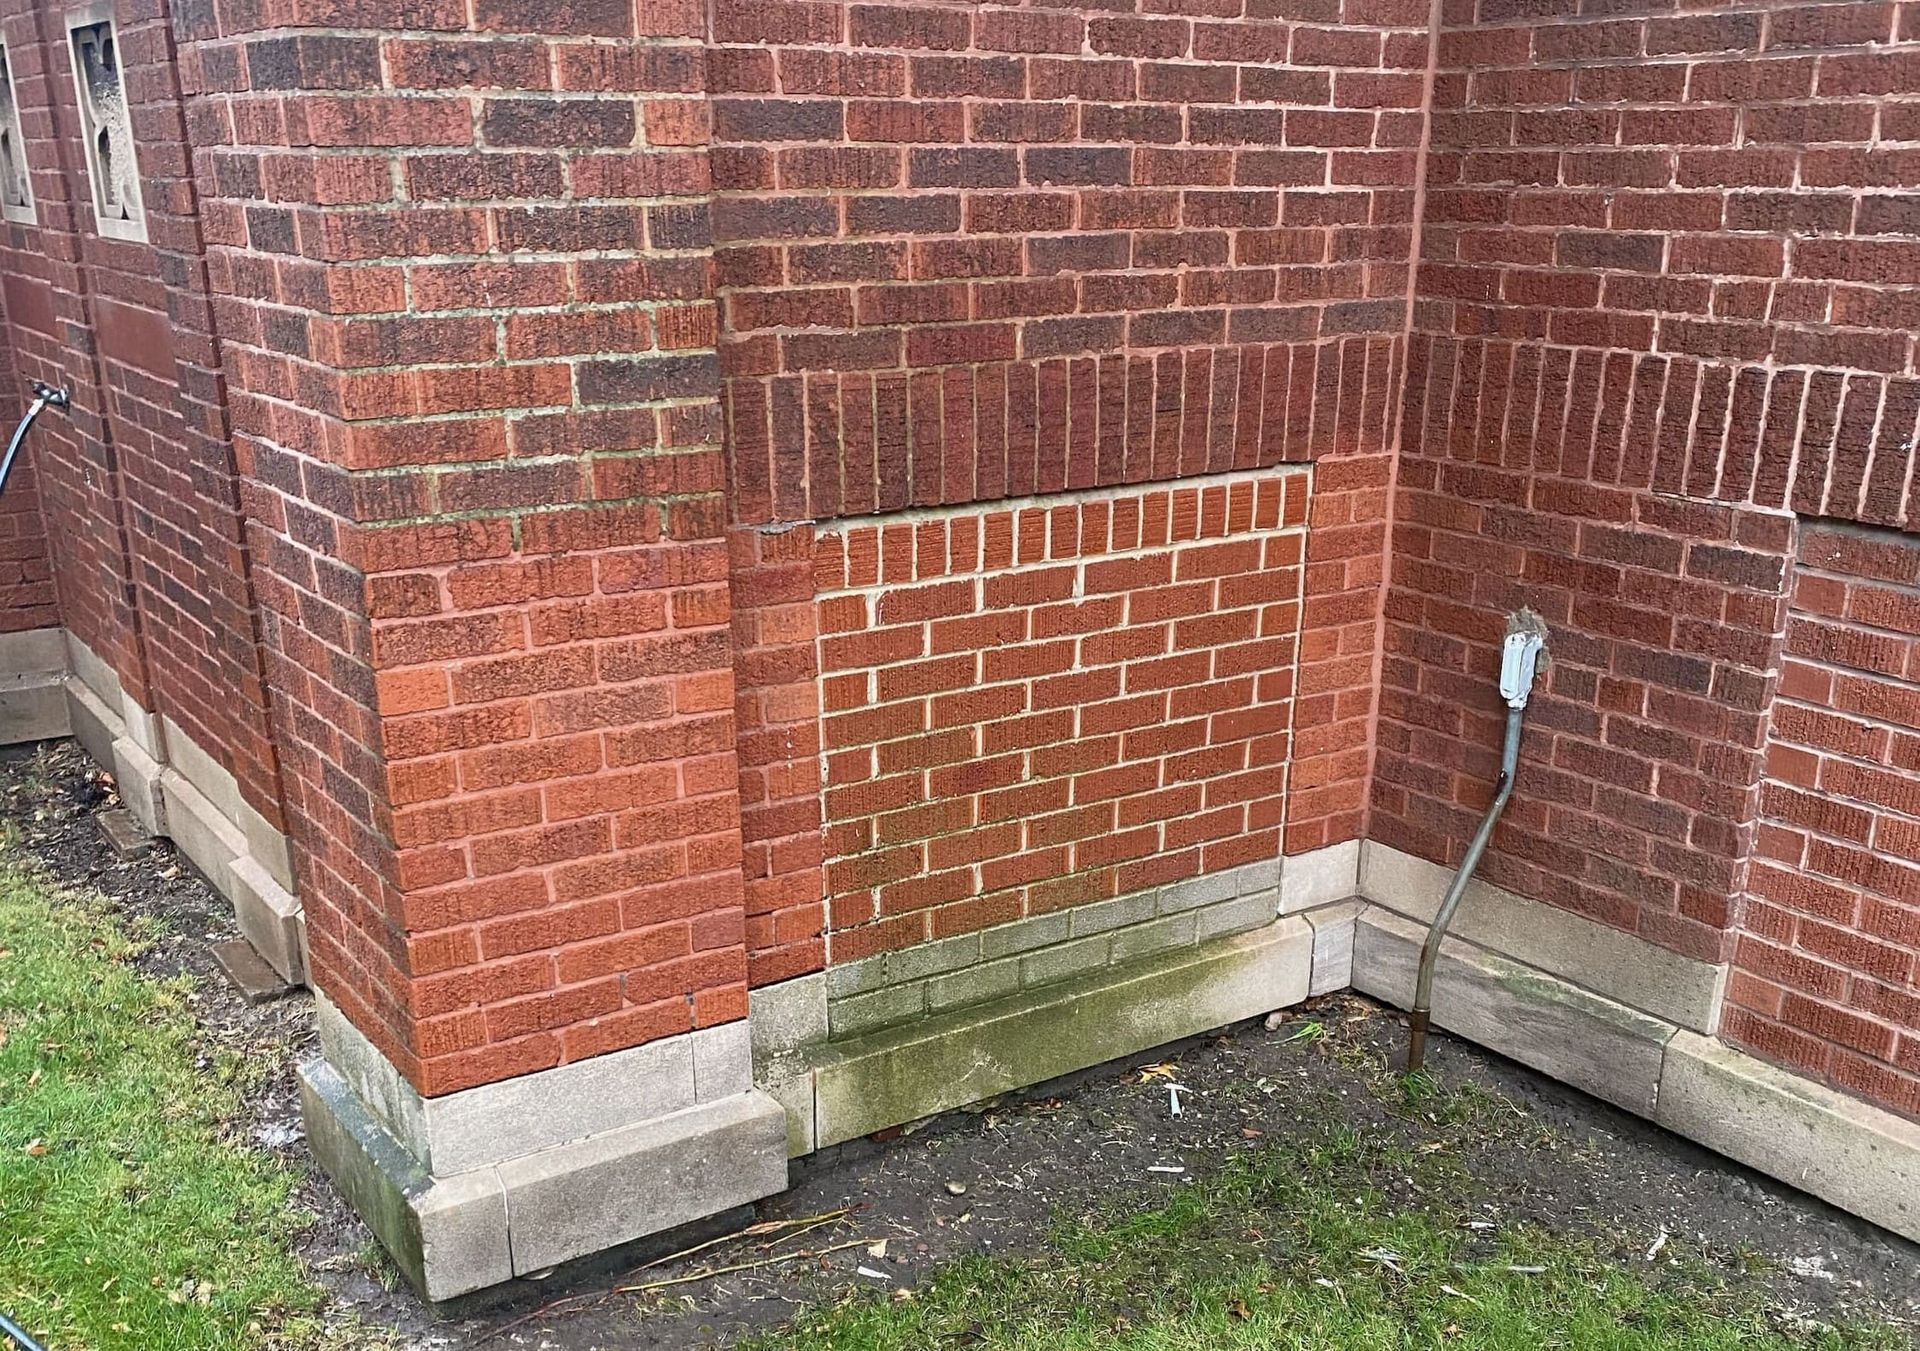
1. Substrate Type and Condition
Different materials exhibit different porosity, absorption rates, mineral compositions, and weathering responses. Understanding substrate behavior is foundational to method selection.
Common substrates and considerations:
- Limestone:
Highly absorptive; excellent candidate for water-based cleaning. Particularly known for retaining carbon staining in protected areas. Overuse of chemicals risks etching or burning.
- Brick:
Varies in hardness and durability depending on era, manufacturer, and firing process. Historic brick often responds well to controlled chemical cleaning but must be tested.
- Sandstone:
Stratified; vulnerable to lamination loss and surface erosion under aggressive pressure or abrasive cleaning.
- Terracotta:
Glazed surfaces may repel certain chemistries; unglazed units require precise dwell times.
- Granite:
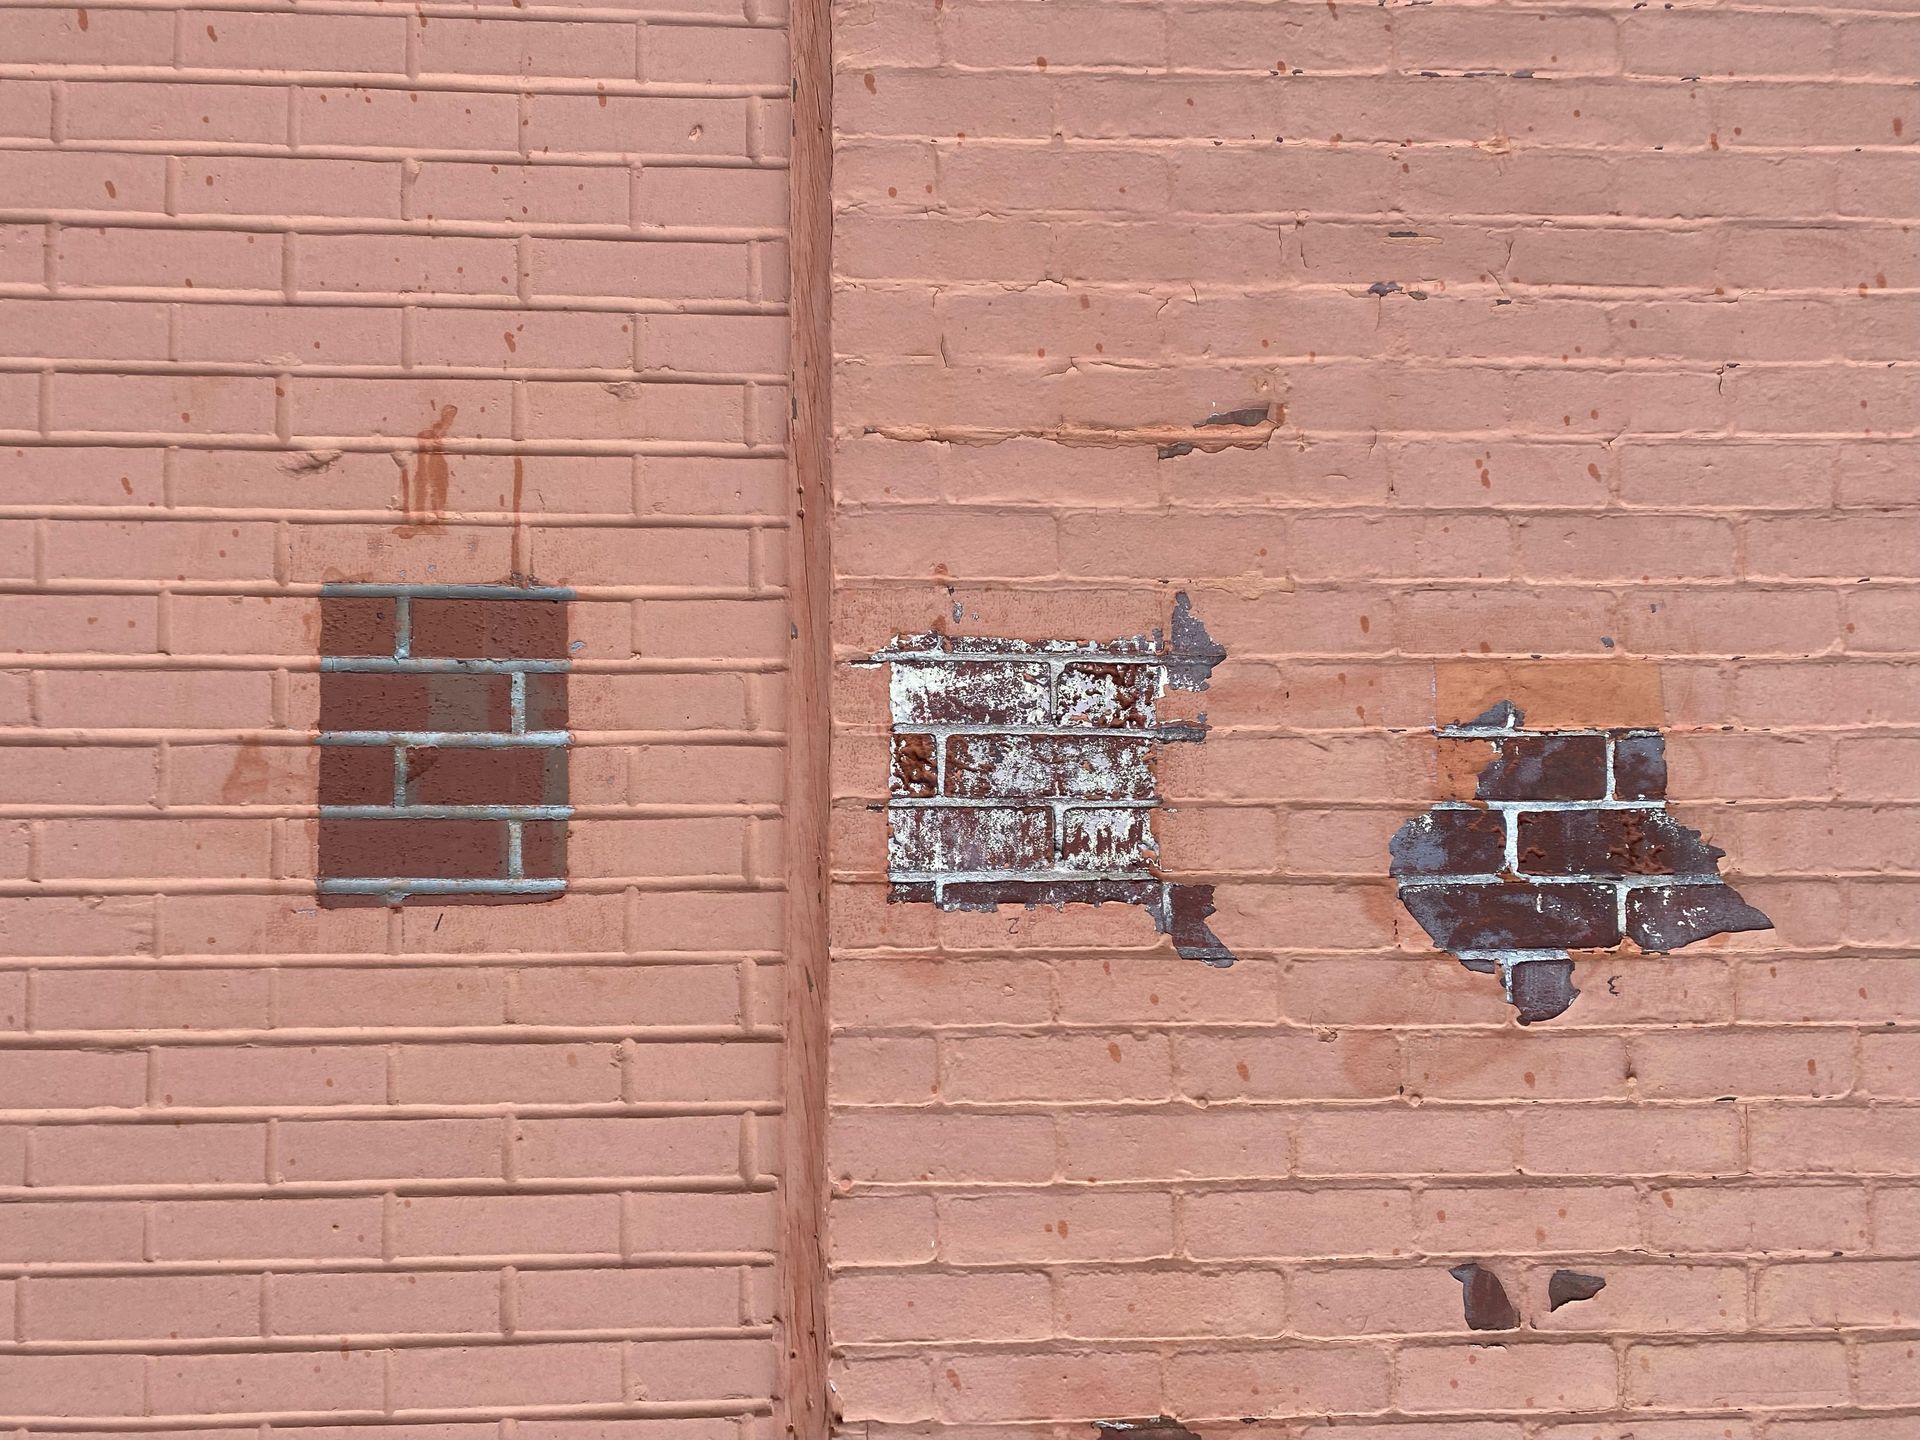
Dense and durable; compatible with most methods but must still be tested for sheen change under abrasive systems.
Substrate condition, including prior sealers, coatings, and previous cleanings, must also be documented. Buildings “remember” past interventions in ways that significantly influence cleaning outcomes. Independent industry guidance reinforces the importance of substrate-specific cleaning decisions. PROSOCO notes that clay brick and concrete masonry units (CMU) have fundamentally different chemical behaviors during cleaning, with brick being generally less sensitive to many traditional masonry cleaners, and CMU being more acid-soluble due to its concrete composition. These differences require variations in dilution, dwell time, and application method to avoid surface alteration. Their guidance further emphasizes that even within the same category of “brick” or “CMU,” variations in porosity, pigmentation, and mineral content can meaningfully influence cleaning outcomes, underscoring why on-site testing is essential.
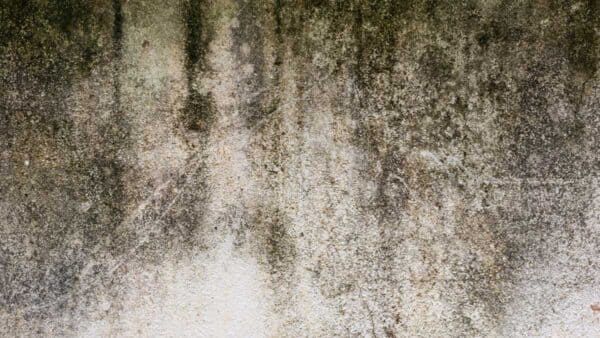
2. Nature of the Soiling or Contamination
Cleaning is only as effective as the match between contaminant and method.
Common contaminants include:
- Carbon staining
- Biological growth (algae, moss, lichen)
- Atmospheric particulates
- Fire soot
- Mineral deposits
- Aged coatings or sealers
- Graffiti and paint films
Each contaminant has distinct chemical or physical bonds with masonry surfaces. Misidentifying the soiling type is one of the most common root causes of cleaning failure. This is consistent with broader masonry science, which shows that water can dissolve soluble materials within a wall and transport them through interconnected pore pathways before depositing them at the surface as the water evaporates, a mechanism documented in efflorescence research by the Masonry Institute. Understanding how contaminants move, accumulate, or crystallize within pore structures reinforces why accurate identification is essential for selecting the correct cleaning method.
3. Environmental and Operational Constraints
Context matters. Several environmental variables directly influence the feasibility and safety of cleaning methods:
- Occupancy status
- Pedestrian traffic
- Waterway adjacency
- Runoff management requirements
- Wind patterns affecting overspray
- Availability of nighttime work hours
- Nearby landscaping susceptible to runoff damage
- Temperature and humidity constraints affecting dwell times
Environmental compliance also dictates whether chemical effluents require neutralization, diversion to sanitary lines, or on-site containment.
4. Adjacent Trades and Project Sequencing
Cleaning activities must be harmonized with:
- Window replacement operations
- Repointing
- Roofing
- Sealant installation
- Masonry patching
- Interior sensitive areas
In many cases, cleaning performed after certain scopes, particularly window installation, introduces unnecessary cost and risk.
5. Scale, Access, and Geometry of the Façade
Large-scale, multi-elevation façades require:
- extended staging
- water flow planning
- interior monitoring during water-based cleaning
- consistent mixing and application at scale
- predictable rinsing methods
Conversely, small, localized cleaning zones may allow for different techniques, equipment, or dwell-time strategies.
6. Historic or Landmark Oversight
Landmark buildings often restrict chemical concentrations, abrasive media types, pressure limits, and equipment use. Water-based methods may be required as a first option.
Together, these six variables form the decision matrix through which all restorative cleaning methods must pass.
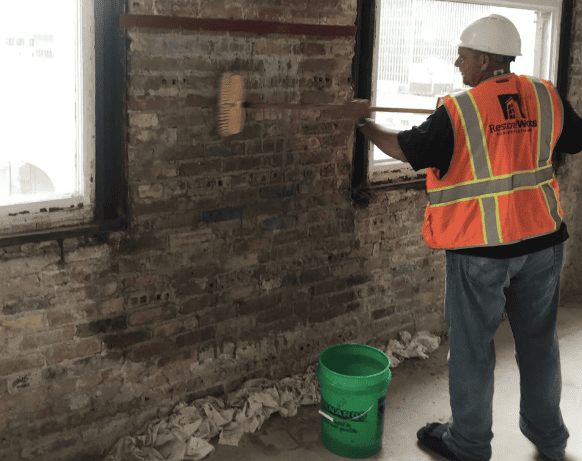
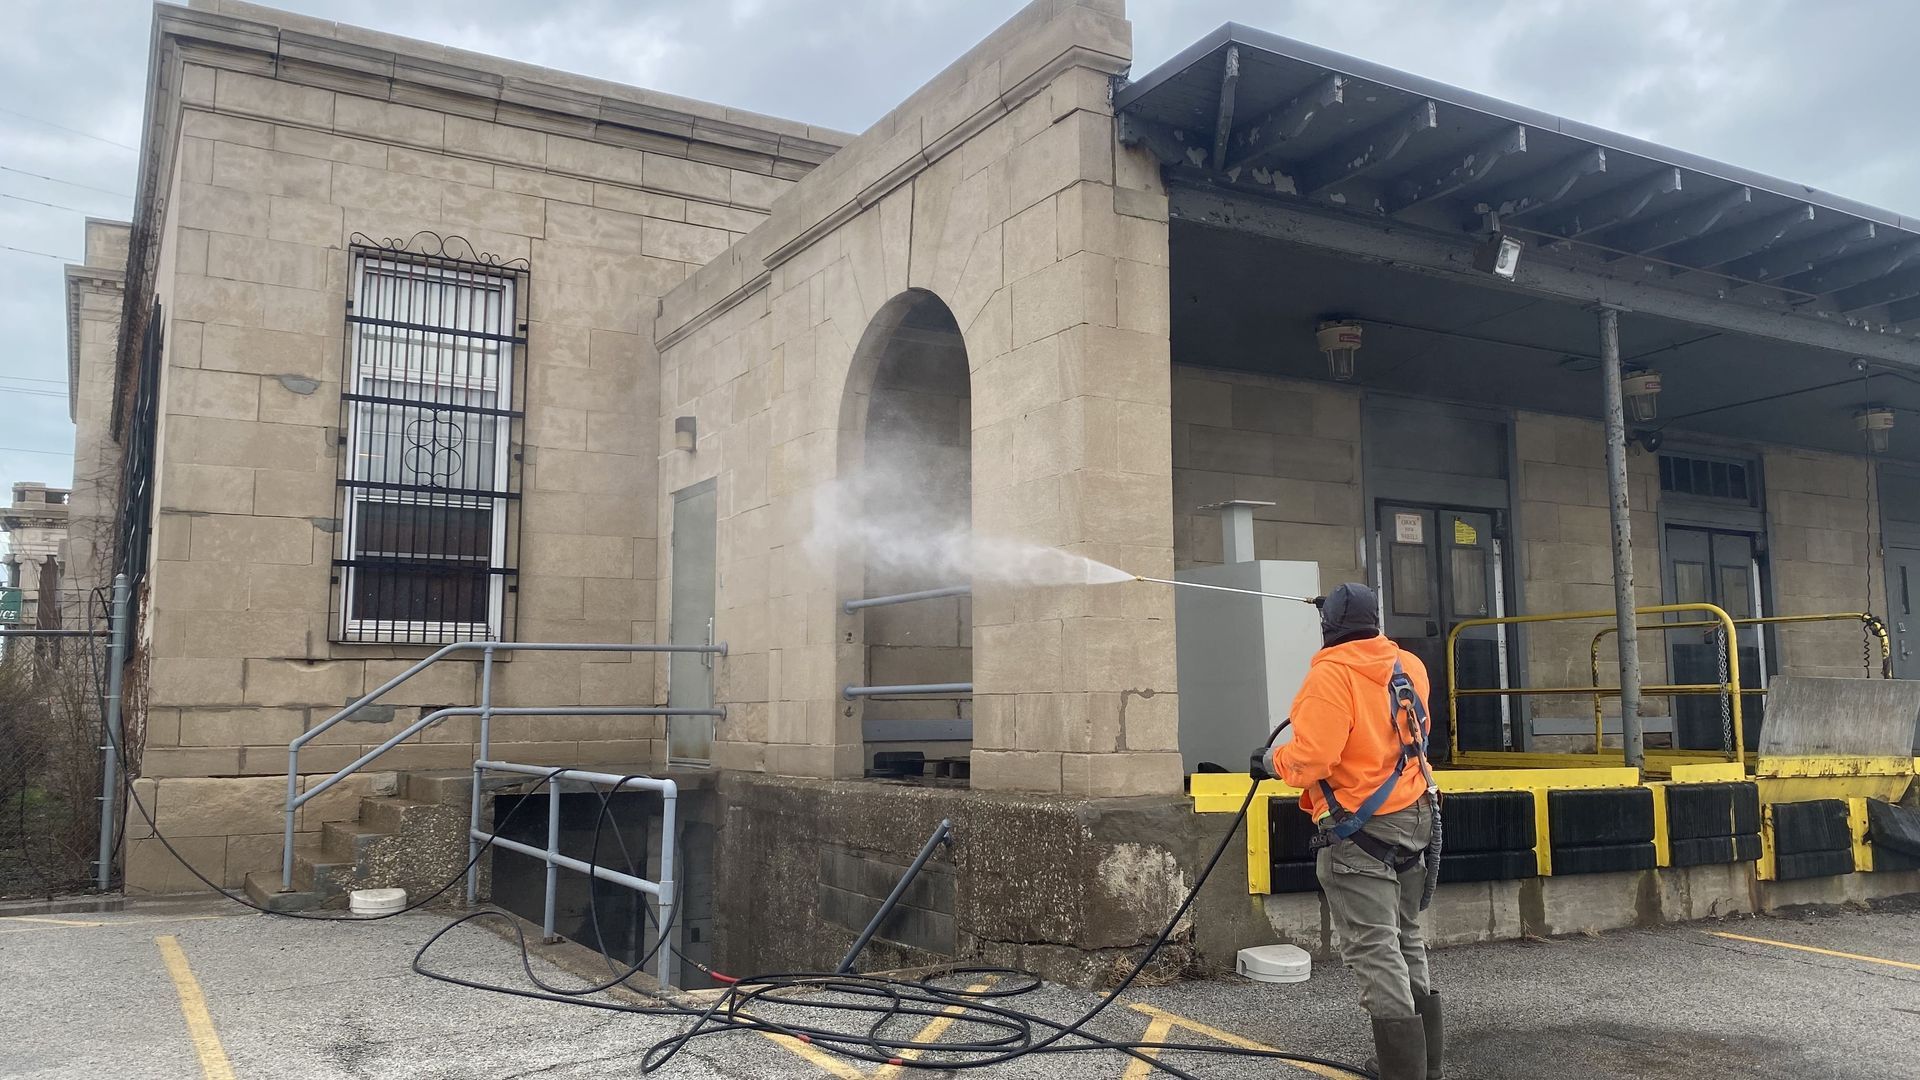
IV. Water Cleaning: Controlled Hydration and Pore Cycling
Water cleaning is one of the least understood methods in the industry because it appears deceptively simple. In reality, effective water cleaning relies on controlled hydration of masonry pores, allowing contaminants (particularly carbon) to migrate outward as pores expand and contract.
Technical guidance from the U.S. General Services Administration supports this mechanism. Their water-soak cleaning procedure notes that prolonged, controlled saturation causes embedded dirt, particularly carbonaceous crusts, to expand and contract at a faster rate than the stone itself, allowing these deposits to fracture and release from the surface. The GSA also stresses that water cleaning is effective specifically because it mobilizes contaminants without mechanical abrasion, making it suitable for delicate or highly ornate calcareous stone where pressure washing or aggressive methods would cause damage. However, they caution that this technique must be tightly controlled: over-saturation can introduce salts, prolong drying times, and increase the risk of oxidation or interior moisture infiltration.
Don's field experience reinforces that water cleaning is never high-pressure cleaning. It is a low-pressure, high-volume method executed with precision.
Typical Parameters:
- Pressure: 20–30 PSI
- Tools: multi-head soak systems, soft-to-medium bristle brushes
- Duration: extended soaking cycles over multiple passes
- Objective: mobilize contaminants through pore cycling, not force removal
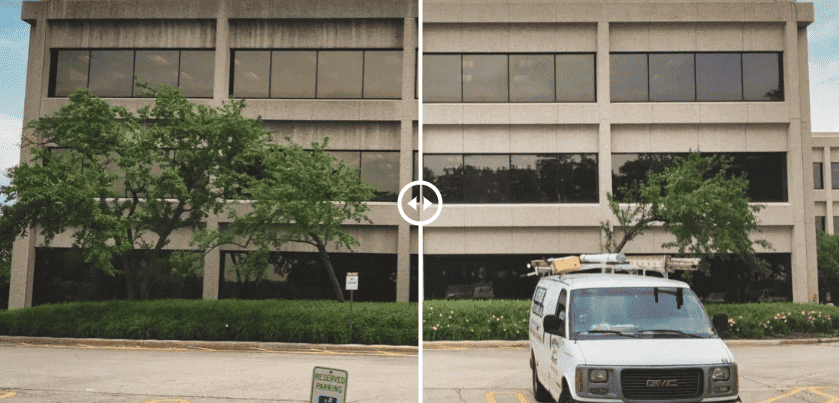
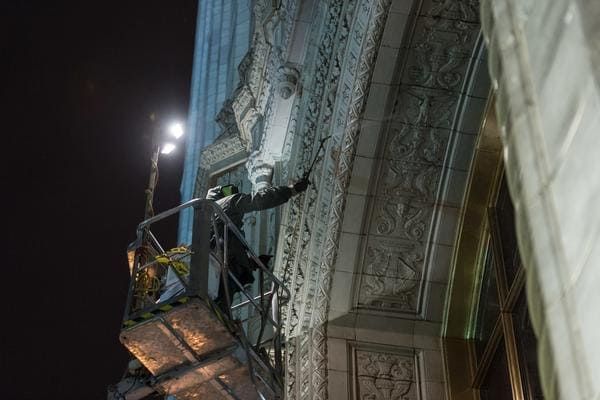
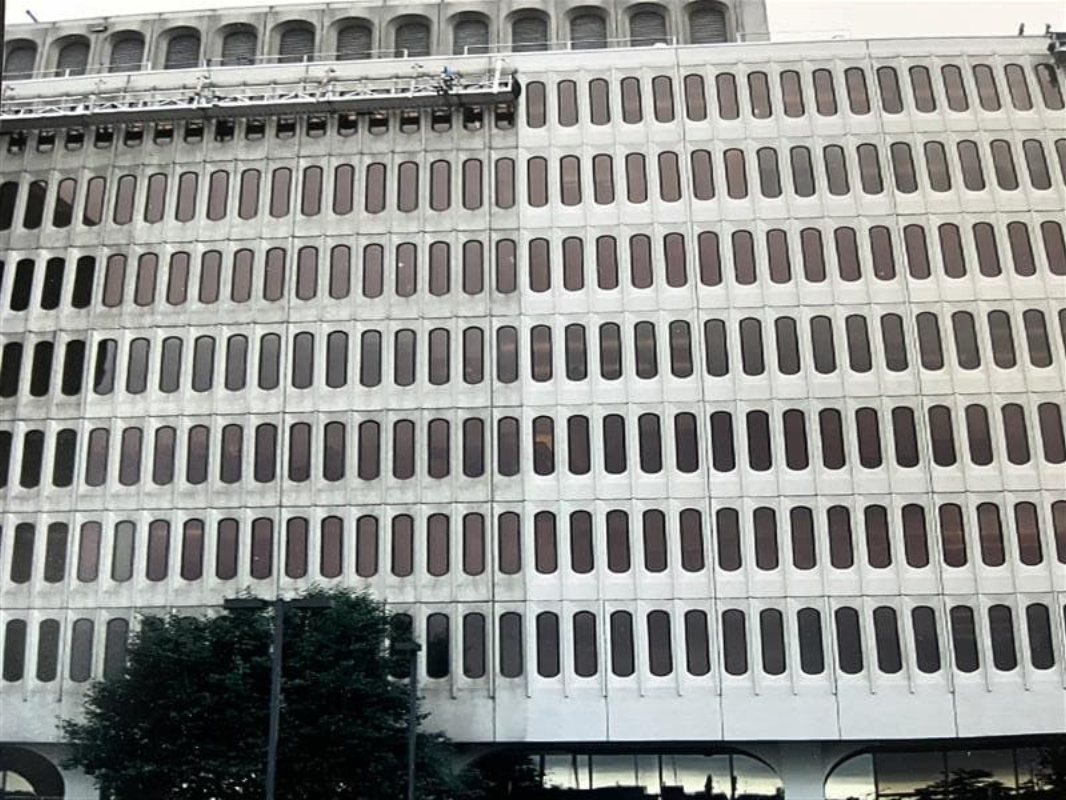
This method is especially effective on Chicago’s limestone façades, many of which carry more than a century of carbon buildup.
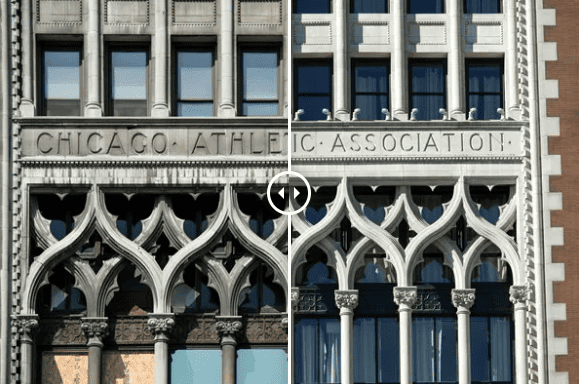
Case Insight: Chicago Athletic Association
One of the most illustrative water cleaning projects in Don’s career involved the Chicago Athletic Association, a limestone structure with deep-set carbon staining. To mobilize the embedded contaminants, RestoreWorks deployed approximately 2,000 water tips simultaneously, producing a level of saturation comparable to severe weather conditions.
The technical lessons from that project include:
1. Water infiltration is not a failure; it is an inherent risk of the method.
Even with careful staging, water will find cavities, cracks, and concealed pathways.
2. Interior monitoring must be continuous.
Coordinating with building engineers and interior staff prevents disruptions and misinterpretation of normal infiltration.
3. Water cleaning rewards patience, not aggression.
Extended soak cycles produced results that harsh chemical cleaning might have failed to achieve safely.
4. Proper rinsing is mandatory.
Residual pollutants must be removed to prevent streaking or staining during drying.
Water cleaning succeeds when teams embrace patience, predictability, and respect for the substrate, not when they pursue rapid visual transformation.
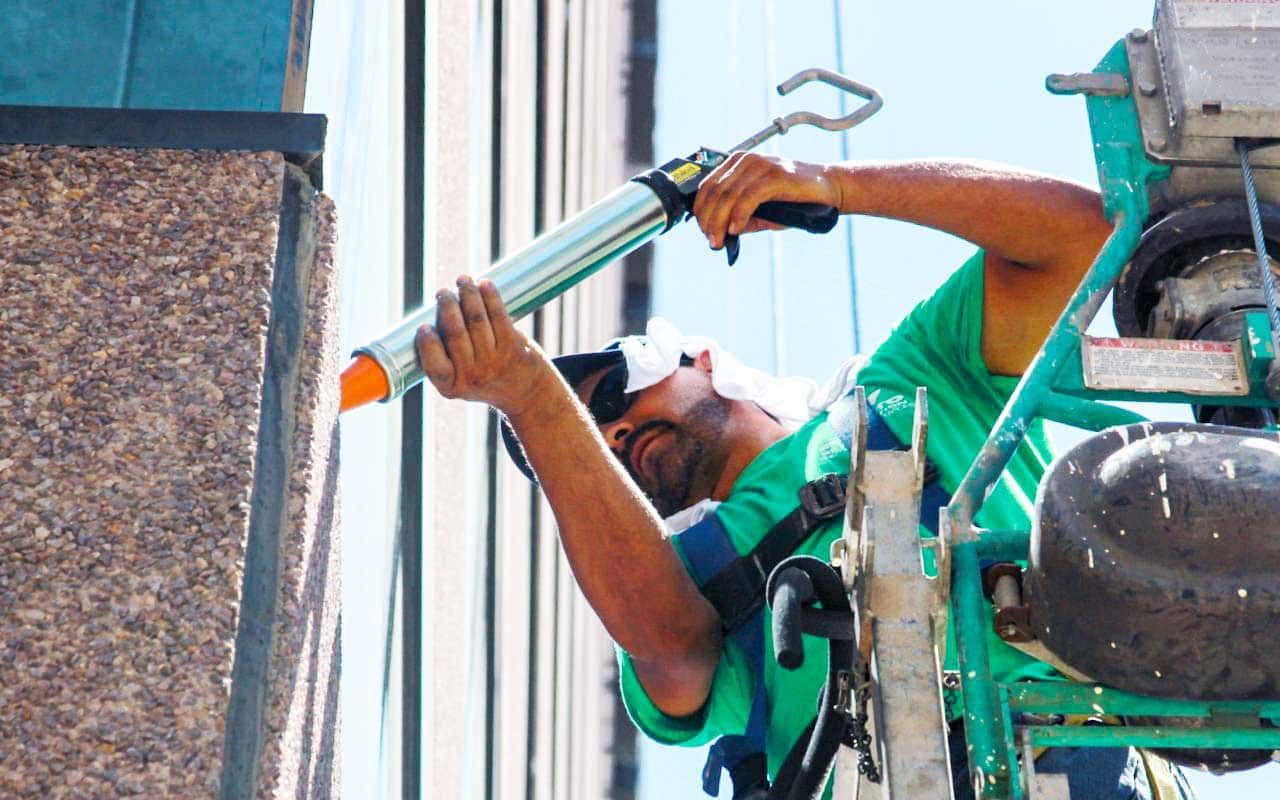
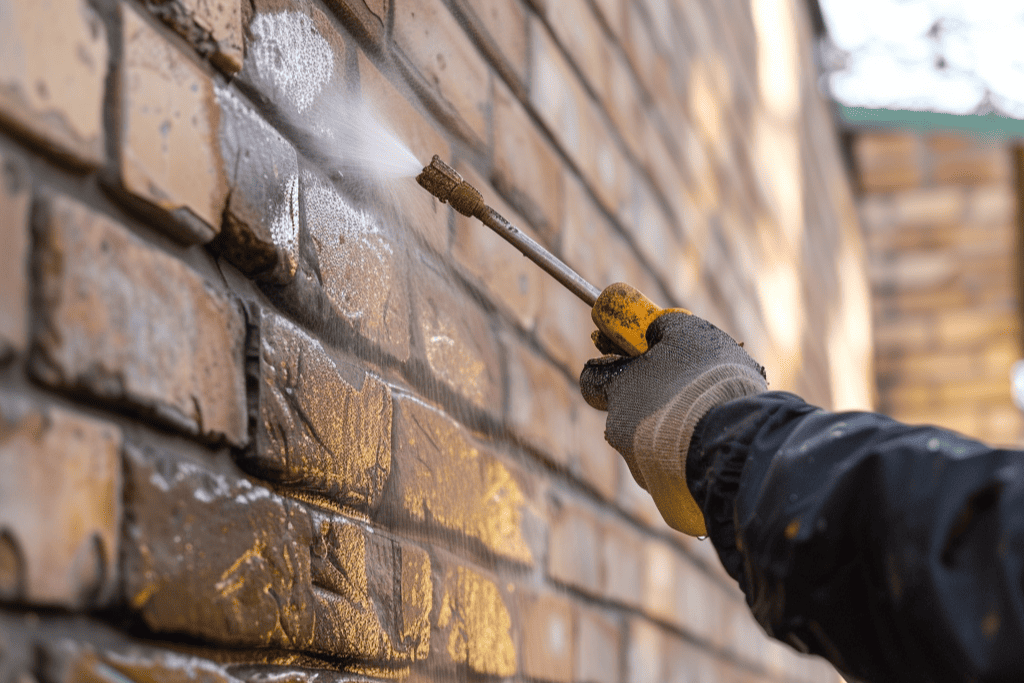
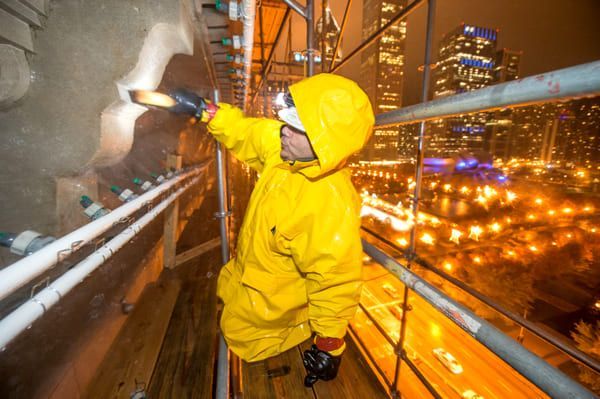
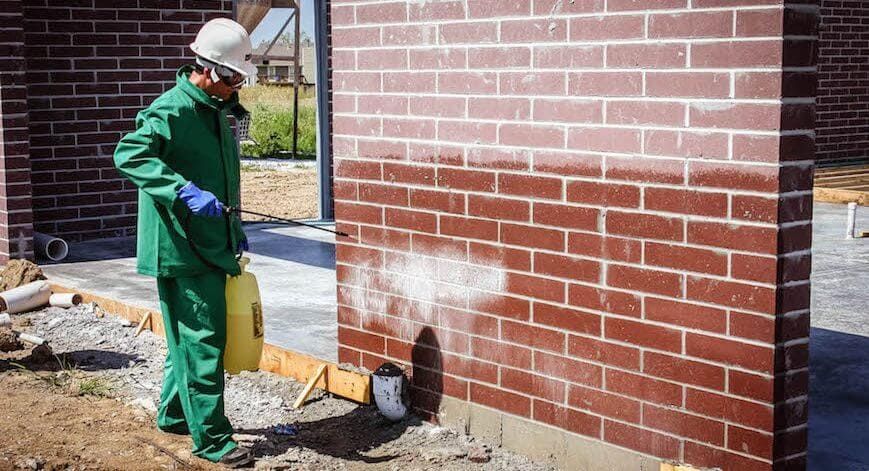
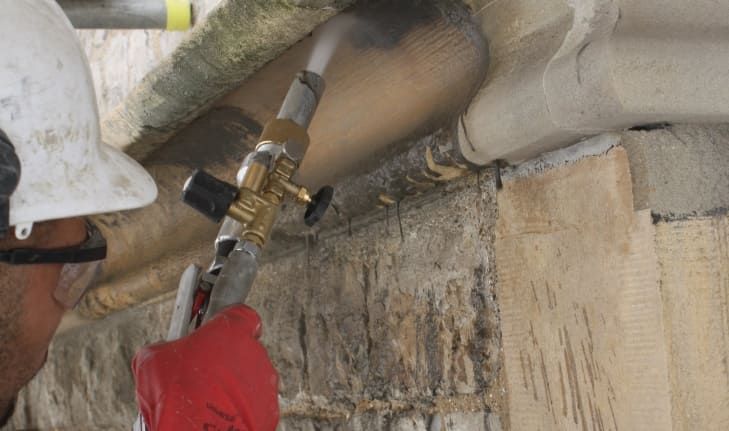
V. Chemical Cleaning: Controlled Chemical Reactions and Precision Application
Chemical cleaning is the most commonly used technique in modern masonry restoration, but it is also one of the most frequently misunderstood. Success depends not simply on “using the right product,” but on controlling variables including dilution, dwell time, temperature, substrate condition, and rinsing method.
Industry guidance reinforces how often chemical cleaning is misapplied. SPECMIX, drawing on PROSOCO’s national field technicians, notes that the most common failures in new masonry cleaning stem not from the products themselves but from improper application, such as using muriatic acid, applying cleaners at high pressure, cleaning before mortar has cured, or allowing chemicals to “dry in” due to inadequate pre-wetting. Their “10 Commandments for Cleaning New Masonry Construction” emphasize the same principles central to restorative cleaning on existing façades: test before cleaning, pre-wet thoroughly, apply chemicals at low pressure, use proprietary cleaners rather than raw acids, and rely on disciplined rinsing to prevent staining and substrate damage. This alignment across both new and historic masonry reinforces that chemical cleaning succeeds only when variables are controlled with precision.
Don’s field experience reinforces that chemical cleaning should not be viewed as a single category, but rather as a system of targeted chemical reactions designed to break down specific contaminants without affecting the masonry substrate.
1. Chemical Cleaning Fundamentals
Chemical cleaning involves the application of alkaline or acidic solutions formulated to dissolve, neutralize, or loosen contaminants.
Key variables include:
- Chemical Type: alkaline, acidic, buffered, Chelating-based, or specialty formulations
- Dilution Ratio: must be determined through testing to avoid burns, streaks, or surface alteration
- Dwell Time:
excessive dwell can cause chemical burns; insufficient dwell reduces effectiveness
- Temperature and Weather:
heat accelerates reactions; cold conditions slow them
- Neutralization: essential when acidic cleaners are used
- Rinsing: high-volume, low-pressure rinsing ensures complete chemical removal
Chemical systems are highly effective on:
- carbon staining
- atmospheric soiling
- biological staining
- terracotta and glazed materials (in controlled conditions)
- embedded grime in porous brick
- many post-fire residues
The key risk of chemical cleaning is not the chemistry itself, it is misapplication.
Technical guidance from the Concrete Masonry & Hardscapes Association aligns with these principles. Their TEK 08-04A bulletin emphasizes that chemical cleaners must be applied only after thorough pre-wetting and at low pressure to limit chemical penetration. The bulletin also cautions that acids, even when diluted, should never be applied under pressure and must be followed by extensive rinsing to avoid surface etching, color alteration, or re-deposition of partially dissolved material. NCMA further recommends using test panels to confirm that dilution, dwell time, and rinsing procedures achieve the desired results without alteringthe masonry’s appearance.
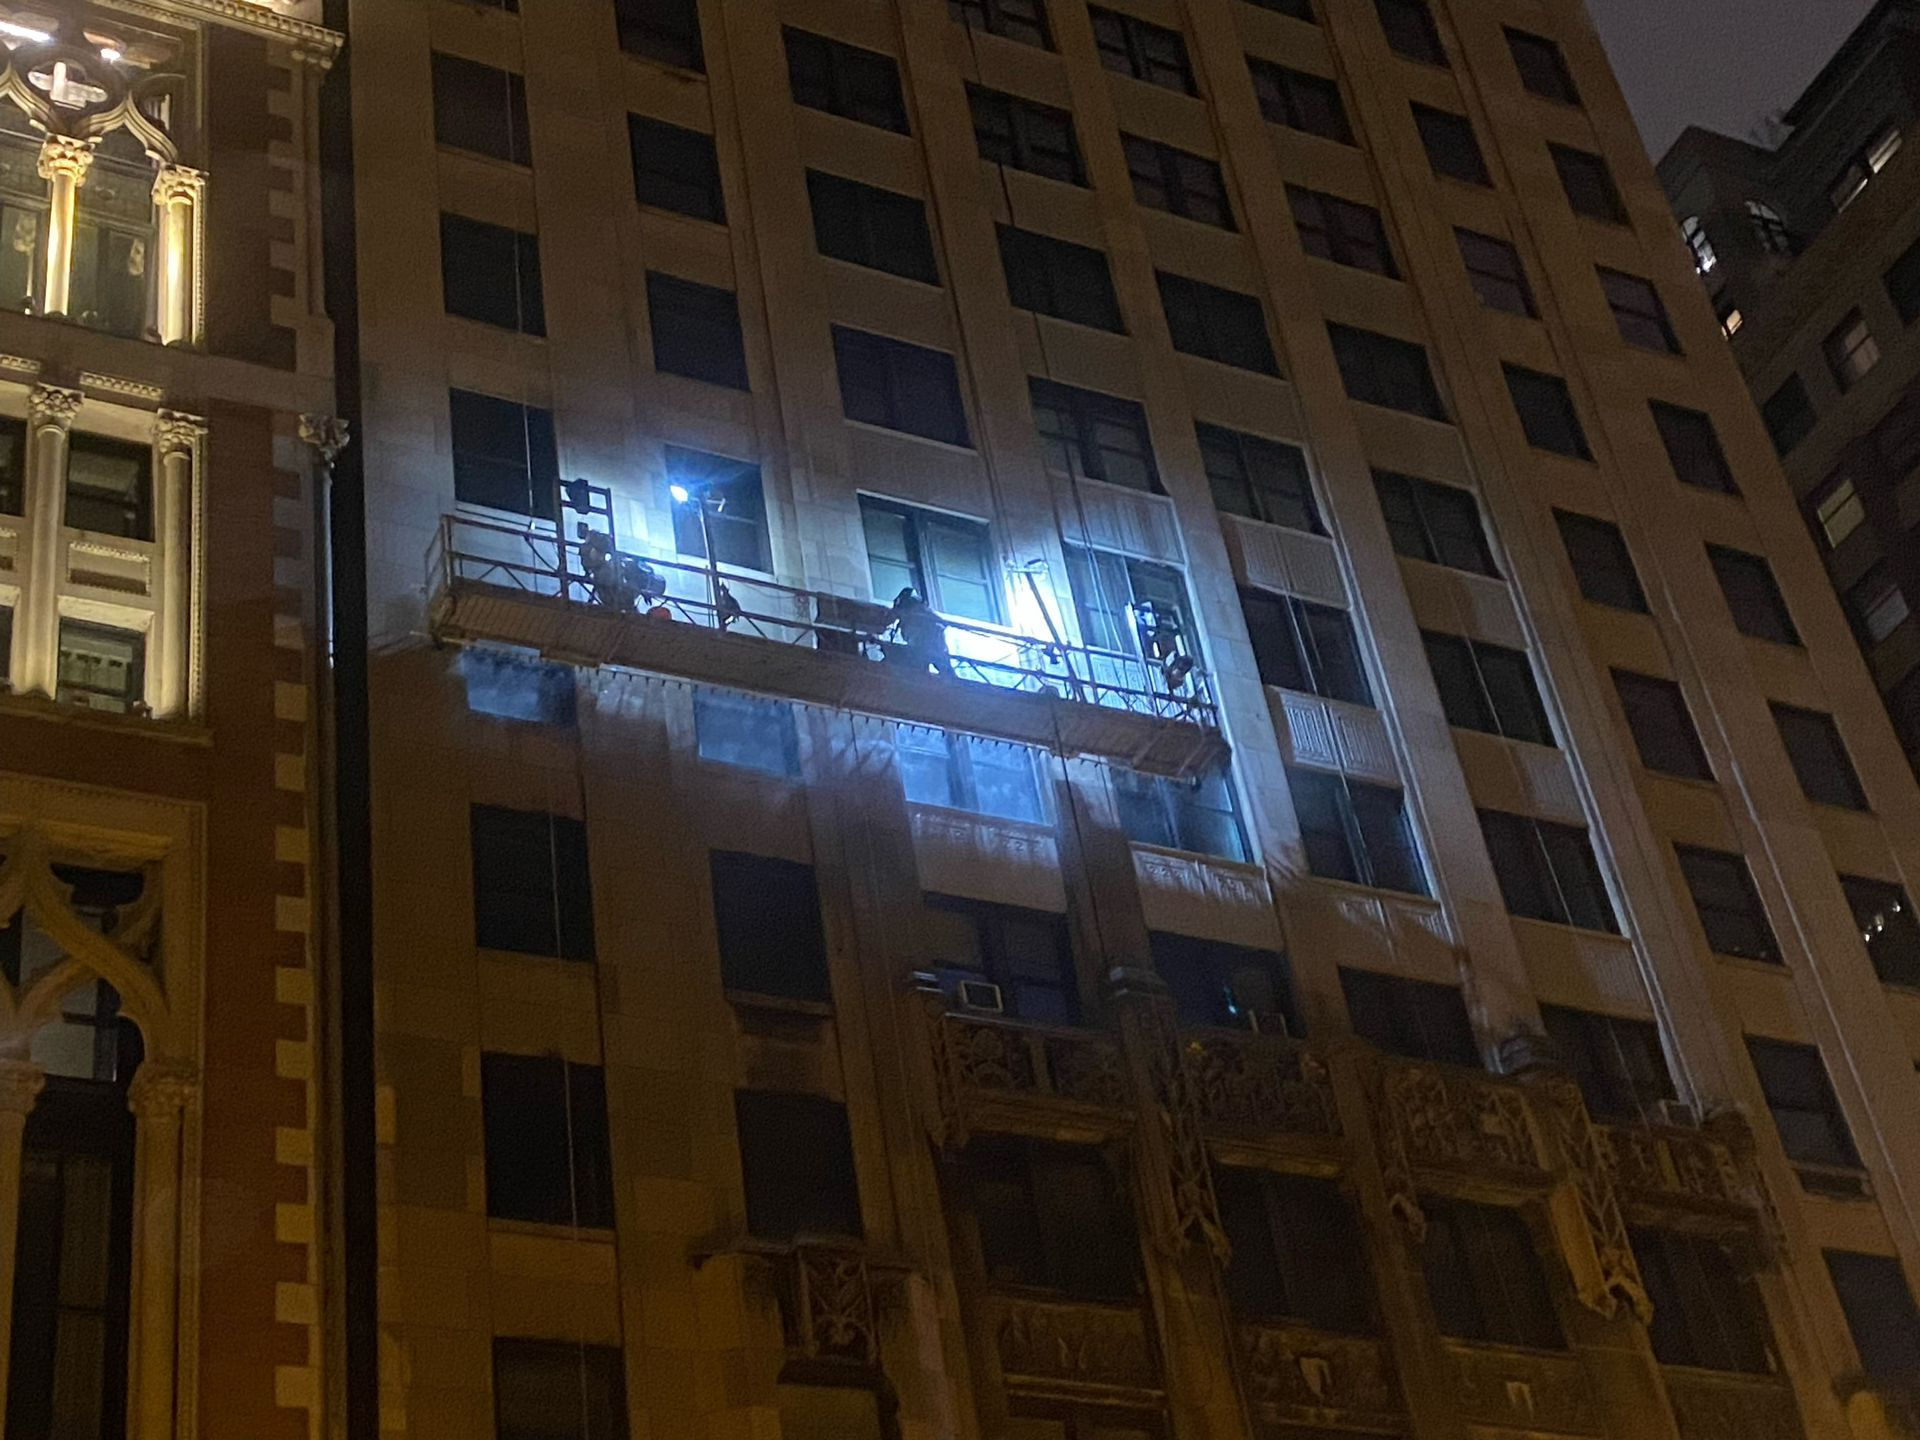
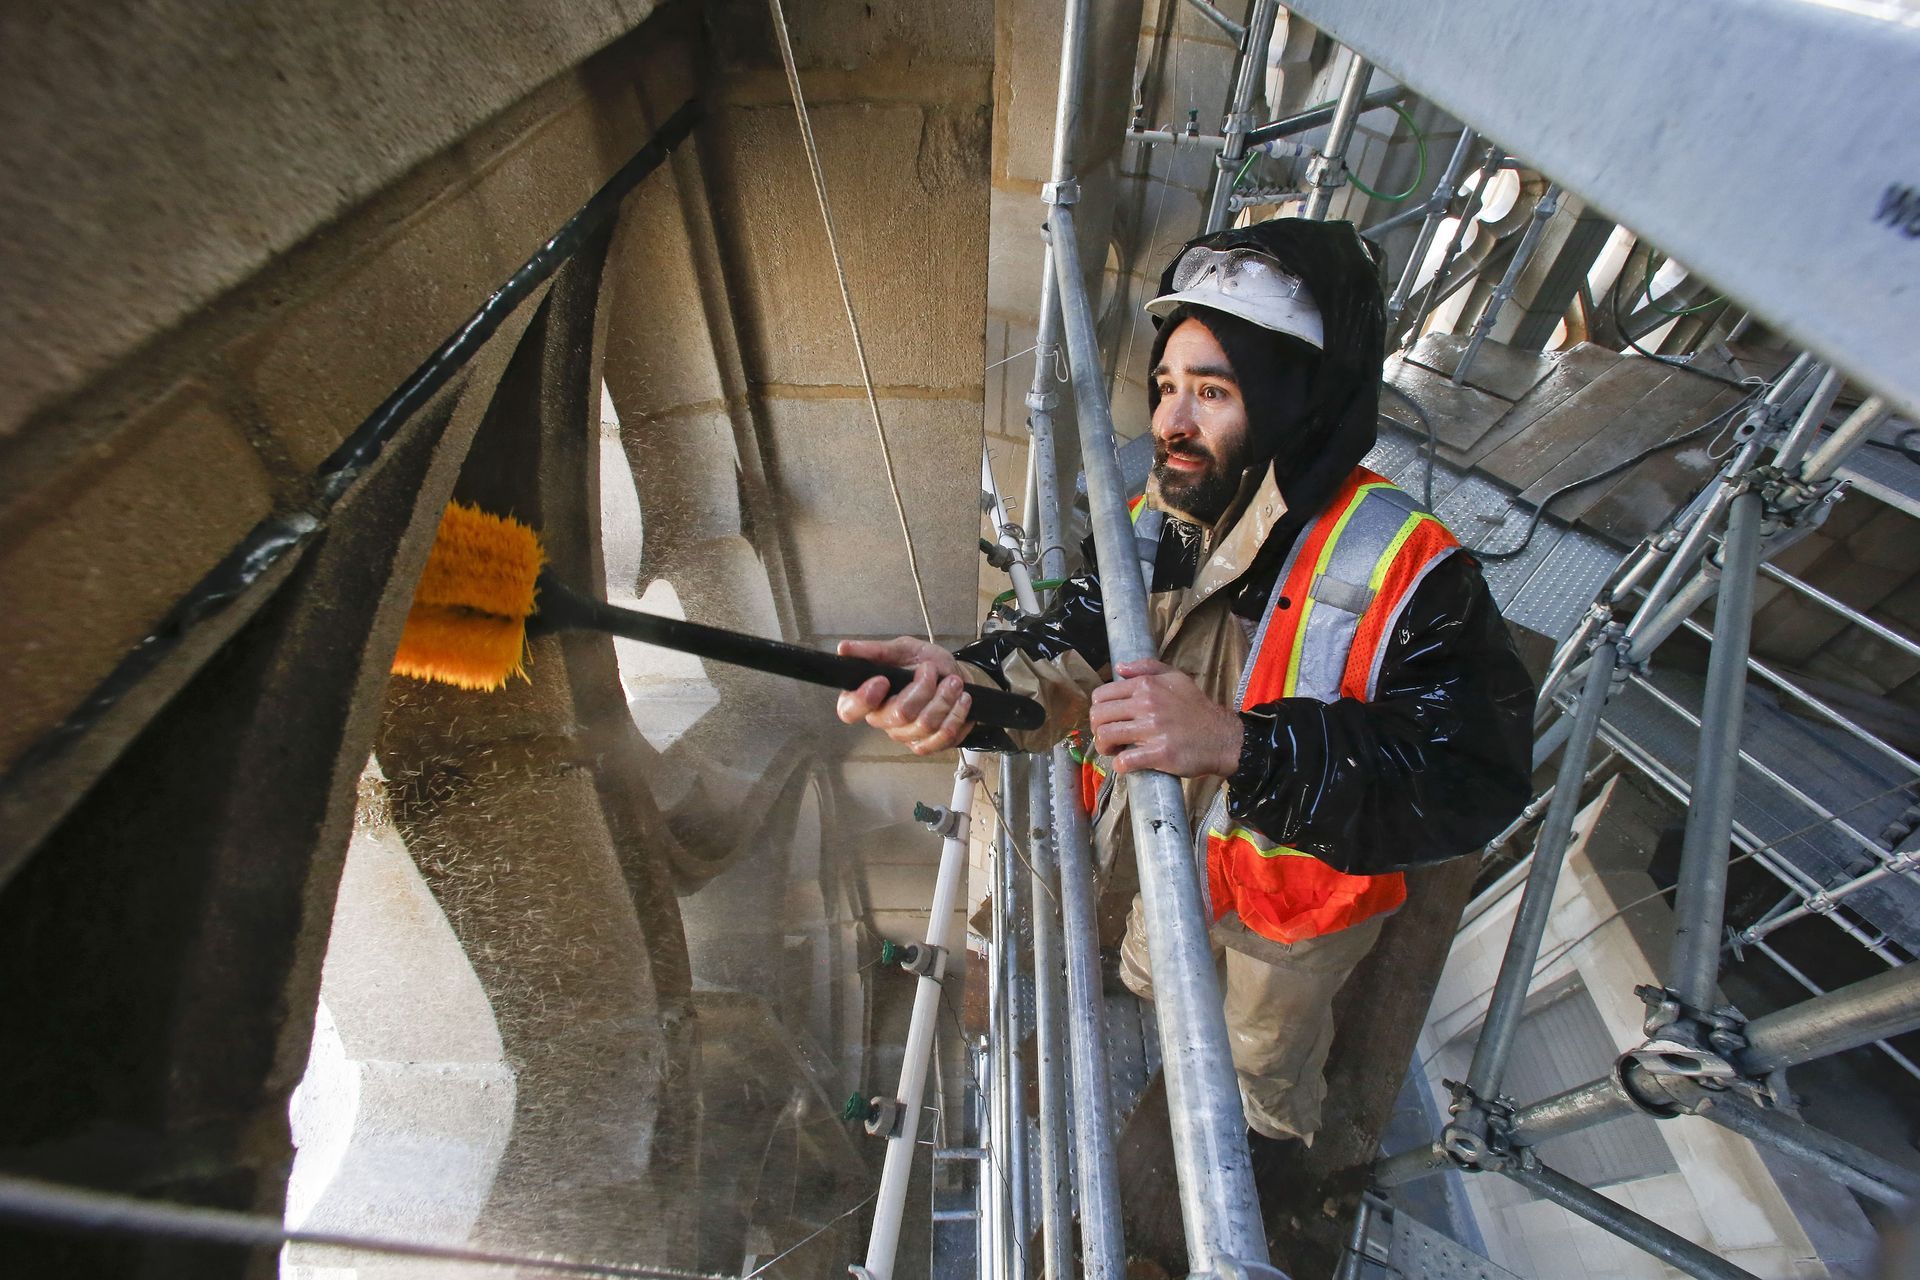
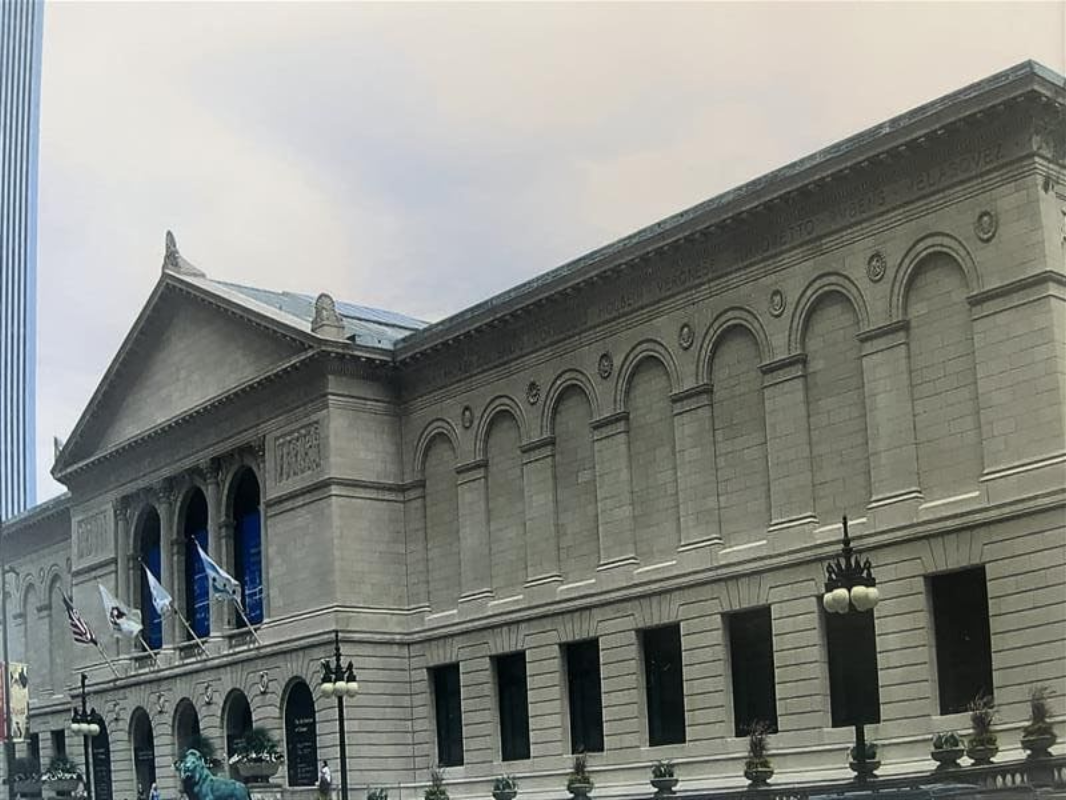
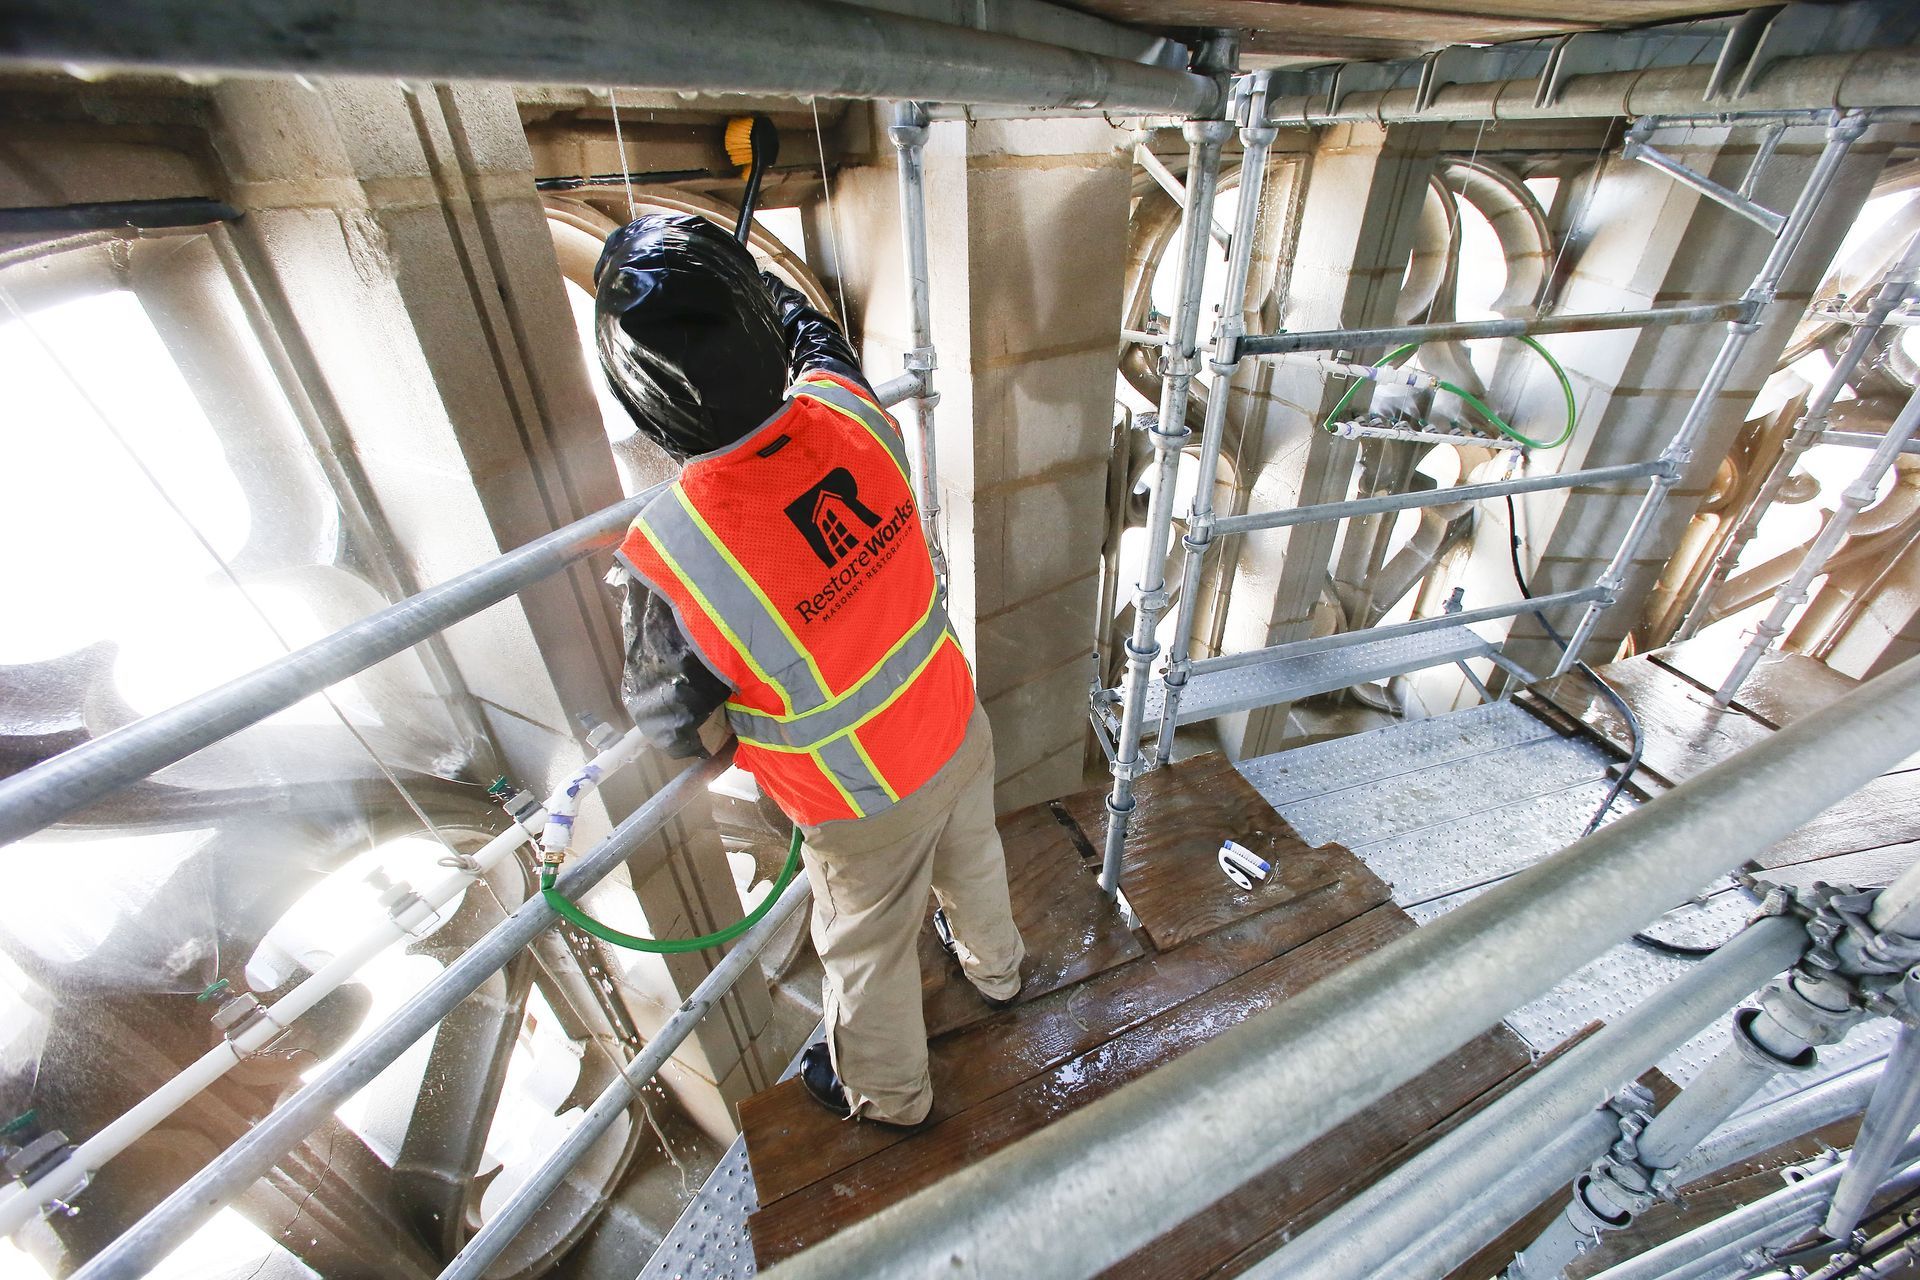
2. Case Insight: Art Institute of Chicago
During a downtown project at the Art Institute of Chicago involving a historic limestone and terra cotta façade, the RestoreWorks team performed chemical cleaning exclusively at night to minimize pedestrian disruption and manage traffic control.
While switching to nighttime work can introduce challenges, the project demonstrated several important principles:
A. Highly Sensitive Ornamentation Requires Elevated Protection
The building featured carved lion heads at the façade’s upper levels. Even a trace amount of chemical overspray or residue could damage these details. The team adopted an uncommon but highly effective practice:
New tarps were used every night, never reused.
Reusing damp tarps can redistribute chemical residues.
B. Controlled Dwell Time Prevents Etching
The crew monitored dwell time continuously under artificial lighting. With less ambient heat and solar energy at night, dwell behavior differs. This required technical discipline to avoid overexposure.
C. Low Window-Count Reduced Risk
Because the elevation had relatively few windows, the risk of chemical haze or runoff damage to glazing was minimized. This informed the method selection during planning.
D. Environmental Control Was Achievable
Night work reduced the likelihood of public interaction with wash water or wet surfaces, simplifying safety management.
The case demonstrates that chemical cleaning is not merely a product selection. It is an operational strategy shaped by substrate, ornamentation, weather, access, and work hours.
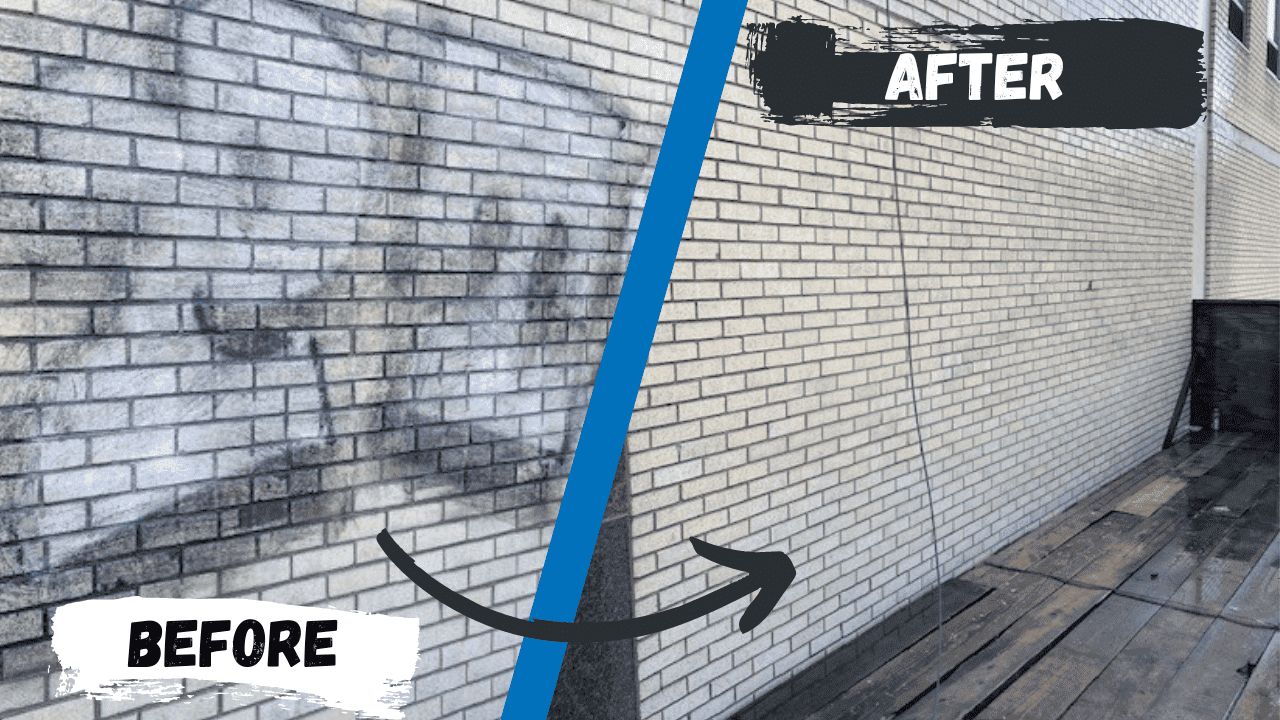
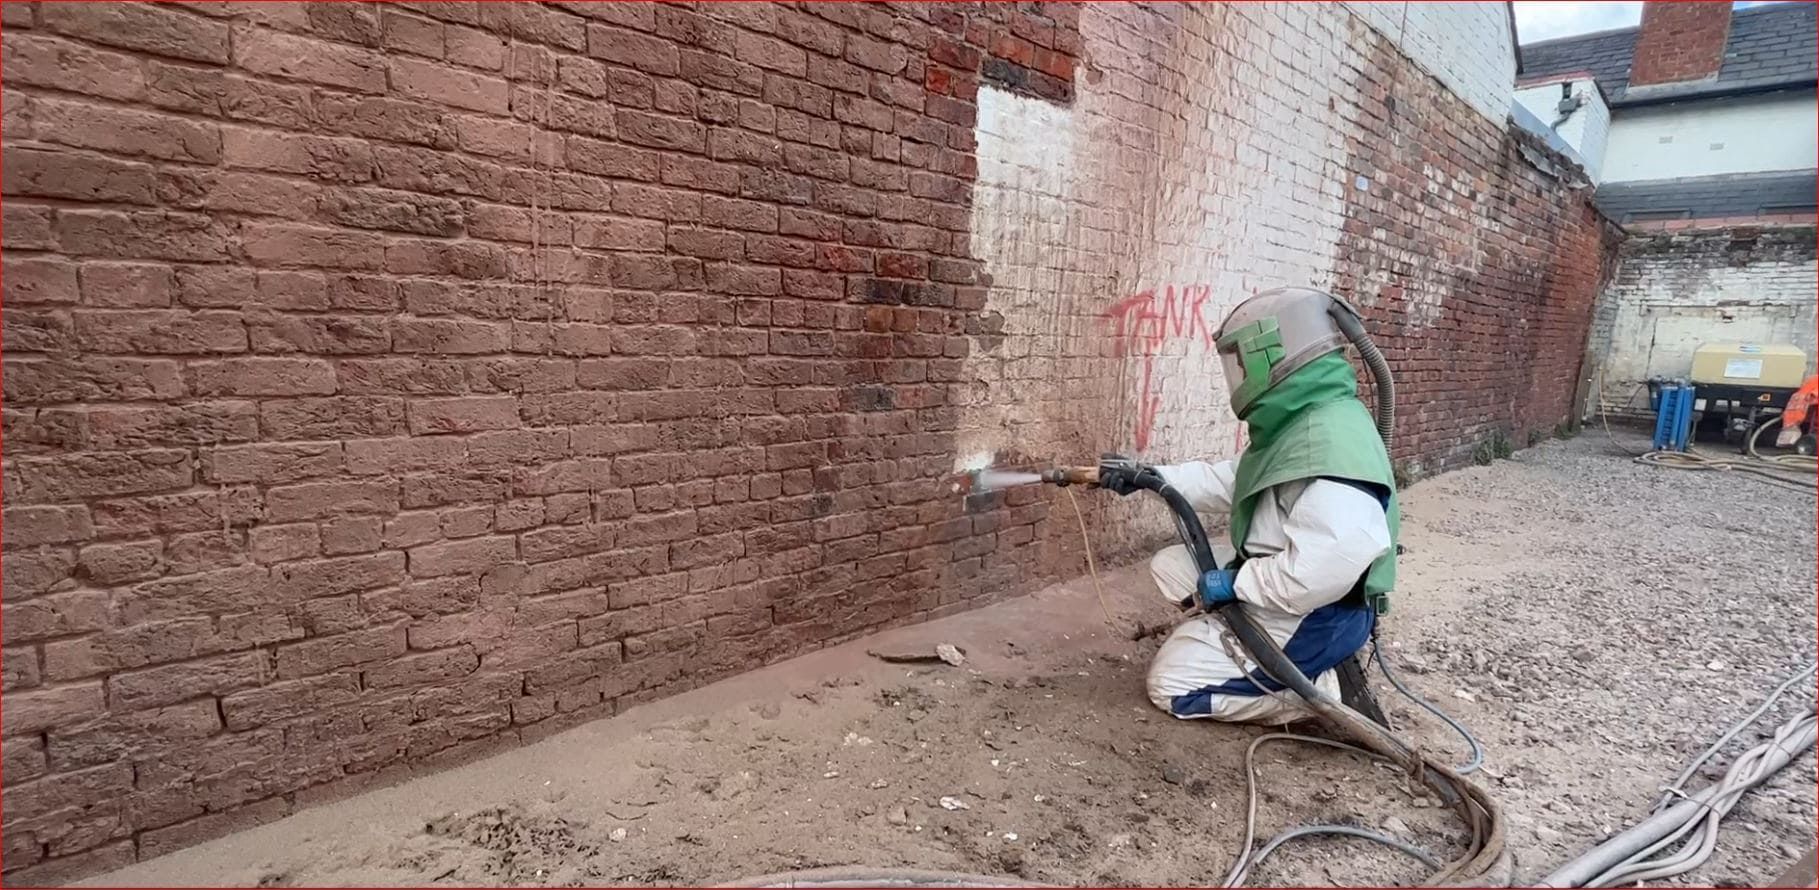
VI. Abrasive Cleaning: Precision Media Removal at Controlled Pressures
The Commission on Chicago Landmarks, based on the U.S. Secretary of the Interior’s Standards for Rehabilitation, reinforces the principle that cleaning historic masonry must rely on the gentlest means possible. The Standards explicitly state that “chemical or physical treatments, such as sandblasting, that cause damage to historic materials shall not be used,” underscoring the expectation that any cleaning method must preserve historic fabric and avoid unnecessary surface removal. For practitioners working on designated or contributing buildings, these requirements elevate method selection beyond best practice: they make it a compliance issue. Test panels, mild starting points, and incremental escalation are not simply recommended, they are part of meeting preservation standards.
Building Conservation research underscores the same caution. As Nicola Ashurst notes, abrasive cleaning is only successful when every variable (media type, particle size, pressure, concentration, nozzle design, and working distance) is calibrated with extreme precision. Abrasive streams cannot distinguish between soiling and masonry, making operator skill the primary determinant of whether the process safely removes contaminants or damages the substrate. Even modern micro-abrasive systems that operate at extremely low pressures (sometimes as low as 5 psi) require expert supervision, test panels, and on-site parameter adjustments to avoid disrupting stone surfaces.
Low-pressure abrasive cleaning (sometimes mischaracterized as “media blasting”) is a highly controlled mechanical cleaning method. Modern systems use:
- 40–70 PSI
- Fine, low-density media (e.g., walnut shell, sponge media, baking soda, recycled glass)
- Variable nozzle geometries
- Moisture injection to suppress dust
Abrasive cleaning is often a method of last resort, but not because it is inherently damaging. Rather, it is reserved for:
- heavy paint buildup
- graffiti removal
- aged elastomeric coatings
- tenacious atmospheric crusts
- contaminants resistant to chemical or water-based methods
When used properly, abrasive cleaning removes only the contaminant, not the stone beneath it.
1. Risks and Controls
A. Pressure Discipline
Even low-pressure abrasive cleaning relies on operator skill. Poor technique, incorrect angles, or excessive dwell can cause uneven surface exposure or create shadows.
B. Media Selection
Density, particle size, and friability determine the aggressiveness of the cleaning action. Harder media or incorrect size selection increases risk.
C. Geometry Awareness
Façade geometry affects cleaning outcome. Setbacks, ledges, ornamentation, and deep mortar joints require multidirectional nozzle passes.
D. Dust and Cleanup Management
Even with water injection, fine media can settle on adjacent surfaces after drying.
This last point became a defining lesson on one of RestoreWorks’ largest abrasive cleaning projects.
2. Case Insight: McDonald’s Corporate Headquarters (Abrasive Media System)
While cleaning part of McDonald’s former headquarters campus, RestoreWorks used a low-pressure abrasive system to remove stubborn buildup that resisted chemical treatment. Don instructed the crew to complete a thorough cleanup each night.
They did.
Crucially, the cleanup occurred
while the surface was still wet.
By morning, the fine media residue had dried into a light dust that settled across:
- pavers
- window frames
- bollards
- landscaping
- ledges
The surface appeared uncleaned, even though the crew had done everything correctly.
The technical lesson was clear:
Abrasive media cleanup must be verified after the surface has dried, not before.
Since that project, RestoreWorks standardizes early-morning janitorial follow-up on abrasive cleaning jobs to ensure cosmetic clarity and client confidence.
This type of detail (small but operationally critical important) is where field experience meaningfully advances whitepaper-level guidance.
VII. The Non-Negotiable Role of Test Panels
Across every method (water, chemical, or abrasive), test panels are the most important step in responsible cleaning. Don repeatedly emphasized that even experienced contractors cannot reliably predict:
- absorption behavior
- discoloration potential
- substrate vulnerabilities
- the visibility of prior treatments
- the effectiveness of dwell times
- the interaction of specific chemistries
- unforeseen surface staining
- the true “clean” condition of the façade
without physical testing.
Test panels are not a courtesy. They are risk identification.
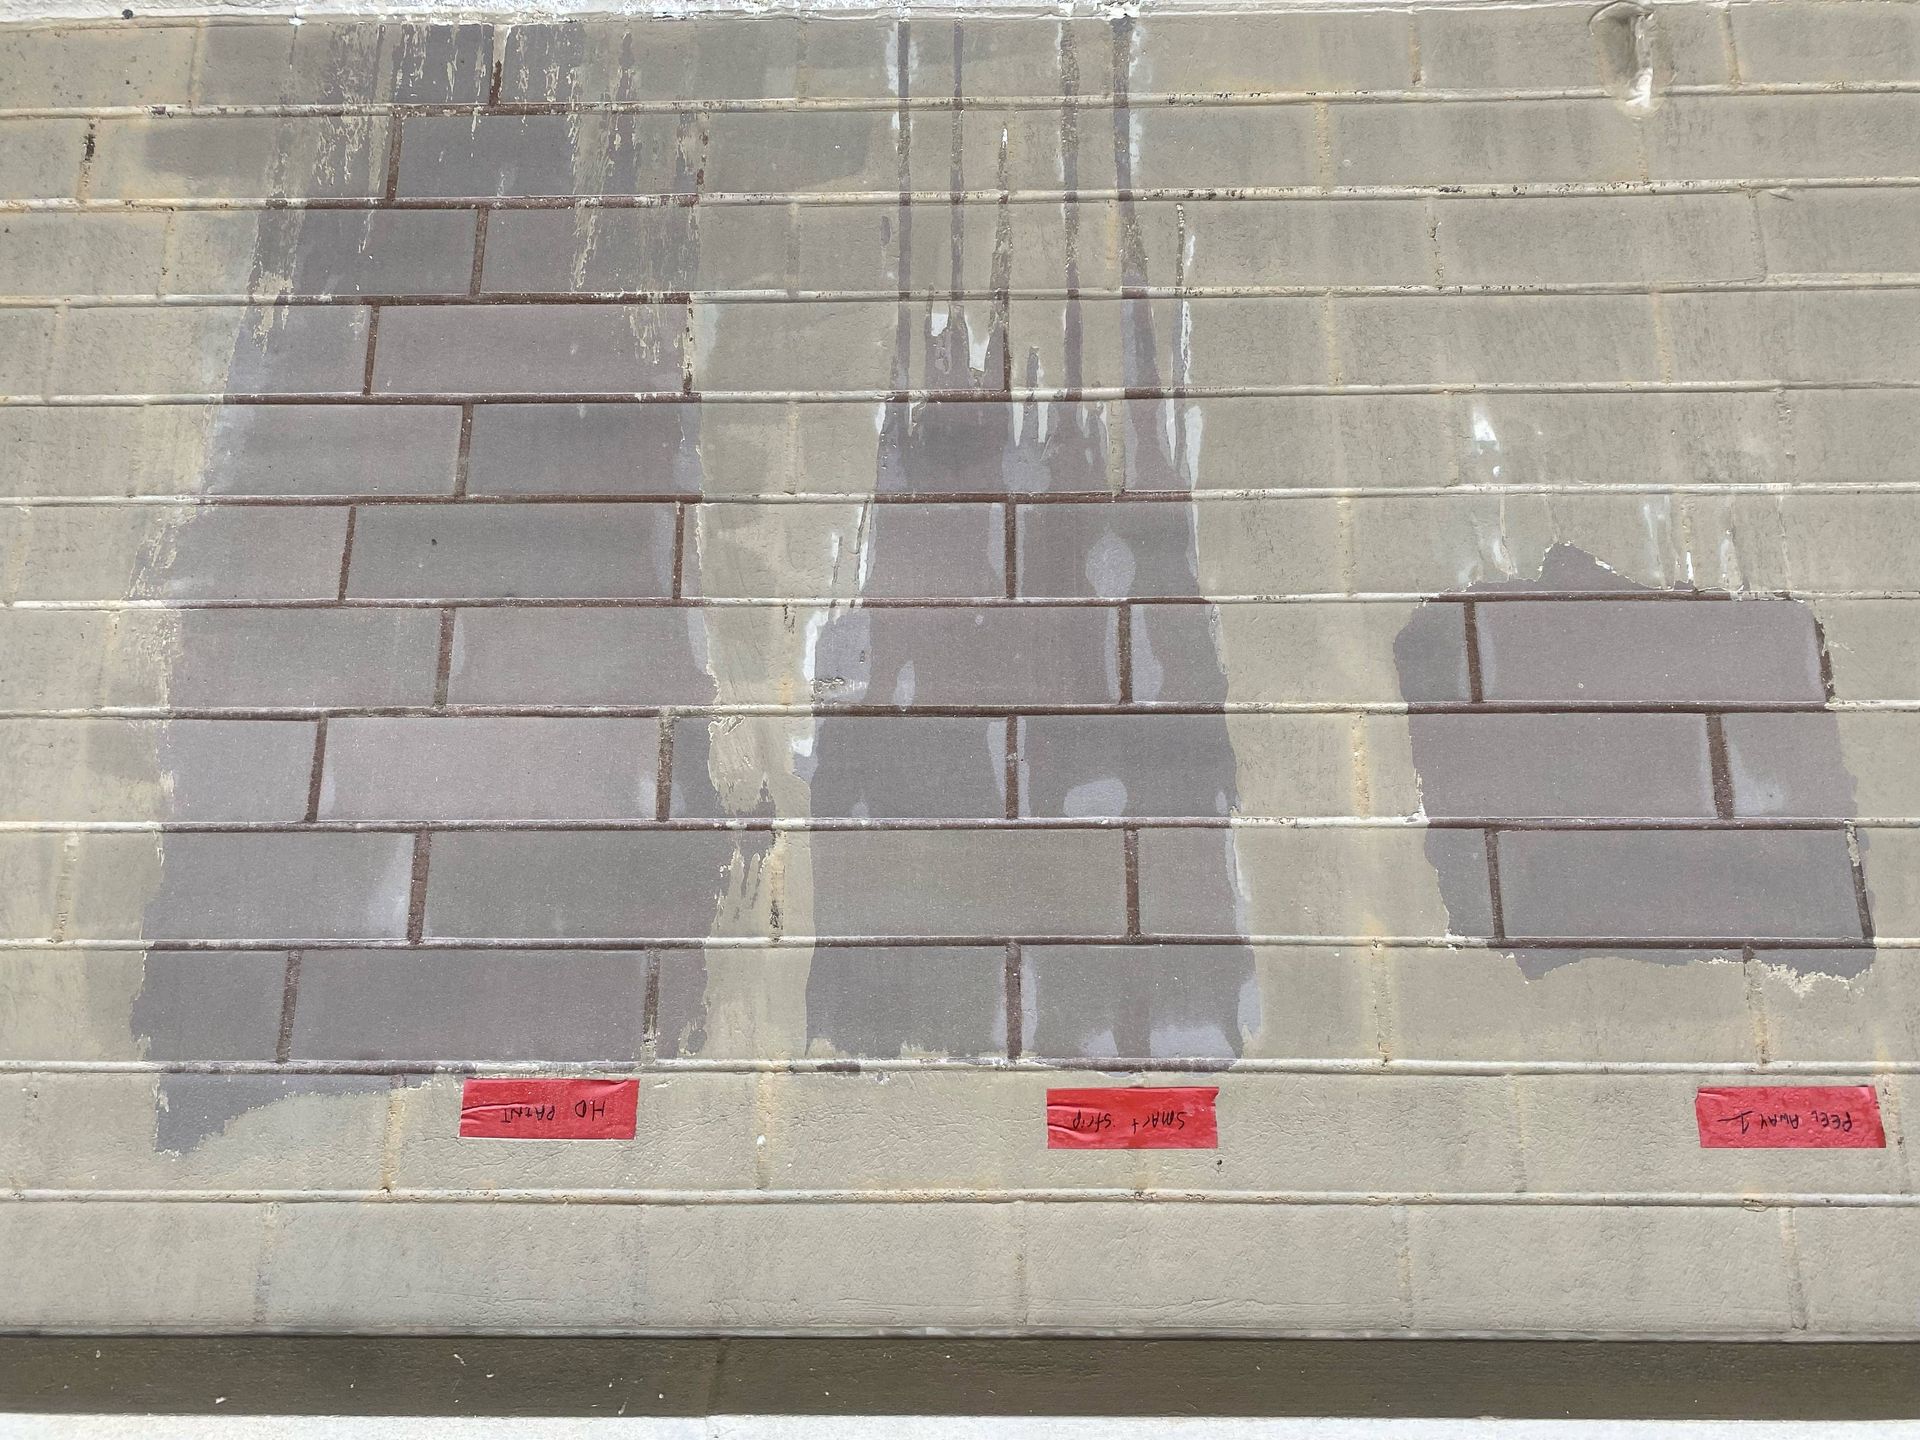
1. Case Insight: An Entryway With Historic Sun Exposure
Don shared a recent example involving a small limestone entryway with a complex history of varying sun exposure, pollution patterns, and a previously applied sealer. Believing he understood the substrate intuitively, he skipped the test panel.
The result?
Unexpected splotchiness and non-uniform coloration that stemmed from decades-old differences in exposure and previous treatments, not from the cleaning process itself.
Client expectations were challenged, not because the cleaning was incorrect, but because testing was not performed to demonstrate what “clean” would realistically look like.
Lesson:
Whenever a mock-up is skipped, expectations (not the stone) are what fail.
VIII. Common Industry Pitfalls and How to Avoid Them
Don’s field experience highlights several recurring mistakes that undermine cleaning outcomes. The following represent practical patterns observed across decades of projects:
1. Overuse of Pressure
High-pressure washing is a construction-era habit that persists despite overwhelming evidence of its destructive potential. Excessive pressure:
- erodes historic brick faces
- etches limestone
- removes surface tooling
- dislodges mortar
- damages ornamentation
No method in restorative cleaning requires high PSI. Low pressure, high control is the standard.
2. Inadequate Rinsing
Residual chemical left on masonry can:
- reactivate during rain
- streak
- cause efflorescence
- discolor adjacent materials
- accelerate deterioration
High-volume rinsing is inexpensive and essential.
3. Overcleaning
Crews often assume that “one more pass” will improve results. In reality, that extra pass may expose aggregate, create etch marks, or introduce surface inconsistency.
Discipline, not enthusiasm, produces consistency.
4. Improper Sequencing
Cleaning should precede:
- repointing
- patching
- sealing
- elastomeric coating
unless water infiltration or interior sensitivity makes cleaning impossible beforehand.
Cleaning after window replacement introduces unnecessary protection costs and risk.
5. Failure to Set Expectations About Biological Staining
Biocide treatments kill biological growth instantly, but they can remain for weeks until UV exposure and weather cycling remove the residue. Clients must be informed in advance. Research from Historic England reinforces this phenomenon. Their studies on biological growth control note that while biocides (typically quaternary ammonium–based) can kill algae, moss, and lichens quickly, visual discoloration and residue often remain for weeks until UV exposure, rainfall, and weathering cycles remove the dead material. They also found that biocides vary widely in performance, with many losing measurable effectiveness within three months and offering only partial suppression of recolonization. The research also highlights that surface orientation (vertical vs. horizontal), stone type, and moisture conditions strongly influence both the initial kill and the rate at which the façade visibly lightens. These findings underscore the importance of setting clear expectations: biocide application is an immediate microbiological intervention, not an immediate aesthetic transformation.
6. Missing Undersides and Recessed Conditions During Abrasive Cleaning
Shadowing occurs when only face surfaces are addressed. Undersides, recesses, and reveals must be cleaned from multiple angles to achieve uniformity.
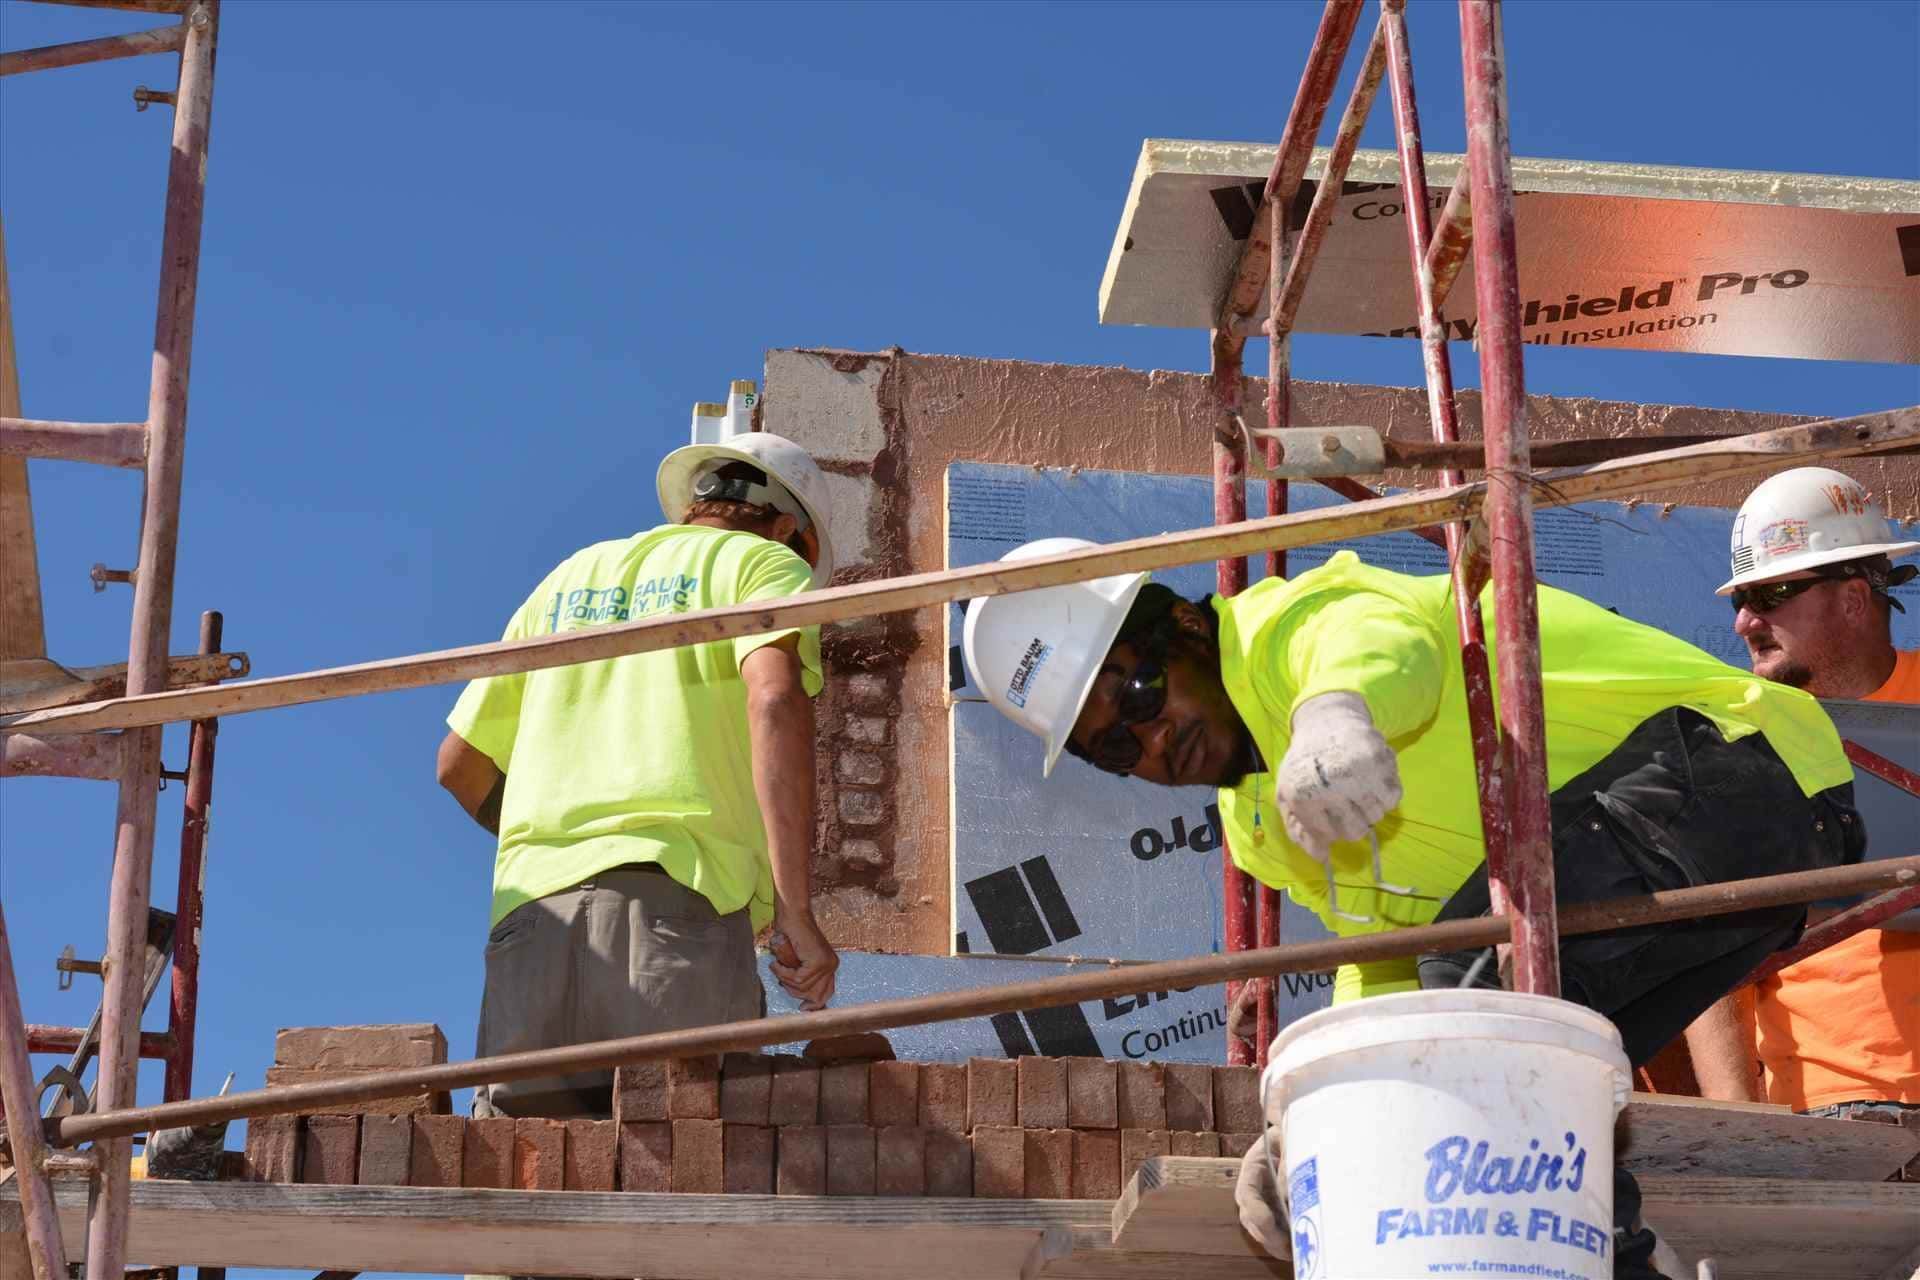
IX. Sequencing Cleaning Within a Broader Restoration Project
Cleaning does not exist in isolation. It interacts with nearly every other façade scope. Don emphasizes that sequencing is as much a technical variable as chemistry or pressure.
1. Cleaning Before Masonry Repair
Cleaning should almost always precede:
- tuckpointing
- stone patching
- brick replacement
- sealant removal and installation
Why?
Because cleaning can expose cracks, voids, and mortar deficiencies that should be repaired after contaminants are removed.
2. Exceptions to the Rule
If a building is experiencing active water infiltration that threatens interior finishes or electrical systems, repairs may need to precede cleaning.
This requires careful coordination to prevent newly installed materials from being damaged during later cleaning.
3. The Window Replacement Warning
Cleaning after window replacement creates:
- increased risk of damaging new glazing
- costly protection measures
- schedule friction between trades
- potential liability disputes
When possible, cleaning should always occur before window replacement to prevent operational inefficiency and reduce cost.
Even when methods are selected correctly, substrates are protected, and work is executed by experienced crews, restorative cleaning often reveals characteristics that owners, property managers, and GC project managers may not anticipate. These outcomes are not signs of failure, they are the natural result of cleaning historic materials and exposing their true condition.
Setting accurate expectations is therefore a technical requirement, not a communication formality.
4. “Clean” Does Not Mean “Uniform”
Historic masonry routinely displays tonal variation after cleaning due to:
- differential weathering
- varied pollution exposure
- runoff patterns
- previous coatings or sealers
- areas protected from sun exposure
Uniformity should never be forced through aggressive methods. Maintaining subtle variation is consistent with the preservation principles that govern responsible cleaning.
5. Hidden Conditions Become Visible
Cleaning often exposes:
- open mortar joints
- previously concealed cracks
- patching or alterations from past decades
- differences in masonry units that were previously masked by soiling
These discoveries should be anticipated and incorporated into post-cleaning repair scopes.
6. Biological Staining May Persist Temporarily
Biocide treatment kills biological growth immediately, but the underlying stains may take weeks of UV exposure and natural weathering to dissipate. This is normal for limestone, sandstone, and certain brick units with deeper absorption profiles.
7. Full Color Cannot Be Evaluated Until Complete Drying
Moisture temporarily darkens masonry. Accurate evaluation typically requires:
- 24–72 hours for limestone
- up to 7 days for dense brick
- longer periods in cold or humid weather
Project teams should avoid approving or rejecting cleaning results before drying is complete.
8. Adjacent Uncleaned Areas Influence Perception
During phased work, newly cleaned areas may appear significantly lighter because surrounding elevations have not yet been addressed. Evaluations should be made after the entire section is complete, not mid-sequence.
These expectations form part of the technical standard for restorative cleaning and should be documented clearly in project communication.
XI. Recommendations for Architects, Engineers, and GC Project Managers
Design professionals and project managers have significant influence over the success of restorative cleaning projects. The following recommendations reflect practices that consistently reduce risk, improve predictability, and align cleaning outcomes with project intent.
1. Require Test Panels as a Specification Standard
Mock-ups should evaluate:
- multiple cleaning methods
- varying dwell times
- potential shadowing or streaking
- substrate sensitivity
- final appearance after drying
Documentation from test panels should be retained as the baseline for acceptance criteria.
2. Avoid Product-Only Specifications
Specifications should define:
- performance expectations
- required testing
- substrate protections
- pressure limitations
- environmental controls
- rinsing and neutralization requirements
Simply naming a product invites misuse and increases contractor liability.
3. Coordinate Cleaning Early in the Project Lifecycle
Cleaning should be discussed during design, not left for the contractor to “figure out” during construction. Early coordination prevents sequencing conflicts and identifies substrate risks before other scopes begin.
4. Clarify Environmental and Wastewater Requirements
Municipal restrictions may apply to:
- chemical runoff
- pH levels in discharge
- collection and disposal of abrasive media
- containment measures near landscaping or public walkways
Responsibility for compliance should be clearly assigned.
5. Require Access Planning and Staging Evaluation
Complex geometries, multi-elevation façades, tight urban conditions, and historic ornamentation all require a detailed access plan. Cleaning results often depend on whether applicators can safely and consistently reach recessed or elevated surfaces.
6. Incorporate Post-Cleaning Repairs Into the Overall Scope
Cleaning frequently reveals repair needs not visible during design. Specifications should allow for supplemental repair items to be added based on findings after cleaning.
7. Align Expected Outcomes With Preservation Motives
On historic buildings, the goal is authenticity, not uniformity. Owners should understand that responsible cleaning preserves patina, not erases it.
XII. Conclusion: Restorative Cleaning as a Preservation Discipline
Restorative cleaning is often underestimated because of its apparent simplicity. Yet as the methods, field conditions, and case insights throughout this whitepaper demonstrate, cleaning is one of the most technically sensitive scopes in façade restoration. It requires:
- controlled physical and chemical reactions
- deep substrate knowledge
- rigorous testing
- precise application
- coordination with adjacent trades
- and realistic expectation-setting with clients and project teams
The lessons presented in Don Zuidema’s 2025 SWR Institute presentation reflect a central truth: restorative cleaning is preservation work, not cosmetic work. It demands restraint rather than aggression, understanding rather than assumption, and discipline rather than speed.
The measure of a successful cleaning project is not how bright a façade becomes, it is how faithfully the building’s material integrity is maintained. When performed responsibly, restorative cleaning extends the life of historic and contemporary structures, reveals the original craftsmanship of masonry assemblies, and establishes a foundation for all subsequent repair and protection work.
By applying the frameworks, methods, and field insights detailed here, architects, engineers, general contractors, and building owners can manage cleaning scopes with confidence, ensuring that the buildings entrusted to them are treated with the care and technical precision they deserve.